Lava Light Lessons #36…Underwater photography

This one is about the basics of underwater photography…the very basics of it.

-Never bother to try to get a shot with one of those disposable cameras they sell you on boats…complete waste of time and money.

-Keep the sun to your back.

-Get close to the subject. All great shark shots, for example, are taken really close to the shark. My dolphin shots below are taken within feet of the dolphins. The more room between your camera and the subject, the more ocean junk will be in your photos…and there is more of it than you suspect.

-Animals in the ocean are moving surprisingly quickly. I try to shoot at 1/750th of a second or faster…up to about 1/2000th.

-The deeper you go, the more color you lose in your shot. The great color is in the first 15 feet.

-Stay calm…thrashing around causes bubbles and they will get in your shot. Try not to let a shark grab you and shake you, you will lose the horizon in your shot and, perhaps an arm.

-For little animals you need a macro lens…like a 65 or 100 mm.

-for bigger animals, like a dolphin or manta ray, wide is better. I shoot a 15mm fisheye or an 18mm prime lens.

-Look for unique. Try to get your shots of an animal doing something…playing, jumping, biting, eating, mating…something.

-have your head on a swivel. I am constantly checking around, over and under me, to see what other animals may be joining in on the fun. A shark surprise is not a fun surprise.

-stay calm at all times and fire away. I love underwater photography and bet you will, as well. Aloha.

Lava Light Lessons #35…Editing Night Shots

Editing night shots gets a bit tricky. A couple of hints…

-The clarity, sharpening, white and exposure sliders in LightRoom will all bring out more stars.

-If you are seeing blue stars and they bug you, desaturate the blue slider in LR and it will turn them white.

-Use a great noise reduction program on your high ISO shots. I use Topaz Noise AI and love it. Hit one button and it will leave you with an image that does not look too smoothed.

-Blow your photo up large to check for things…things like little white dots in the black are of the foreground…that is ISO noise and has to come out. Try pulling back any exposure you have added or any shadows you adjusted or any saturation. If you can not get rid of it, black it out with a brush in LR. Look for those dots in the trees and rocks as well…you don’t want them in your shot.

The hardest thing is to get the coloration right. Where I live, the heart of the Milky Way often has a brown coloration to it. I try to leave it as is. If you saturate your photo heavily it will look really fake. Go with natural.

We strive for editing the shot as it was shot…nothing added nor taken out. However, if a plane streaked across the sky as I took the shot and left a red and white line…I promise you I am taking that out…unless I have a similar shot I can use without that distraction. Be careful, because taking stuff out can get to be a bad habit and many contests will not allow it…and they will catch you when you are required to send them the RAW file.

One last thing to ask yourself…Is there something unique about this shot or is it just another shot of the sky? Strive for the unique. In the unique shot below, I have the two vents of the Hawaii volcano casting up lava light, the Milky Way and the foreground tree cast in red..from the passing lights of a car hitting its brakes on the way down steep Mauna Kea. Uniques sells and this one has been an earner for a long time. Aloha.

Lava Light Lessons #34…Night Photography

Not about astro or deep sky photography…not my expertise.

More about Milky Way photograph or “sky at night” photography.

Some basics…

No tripod…no shots.

The higher you are on a mountain, the clearer the shot is likely to be…depending on weather. Dress warm and always take a flashlight…real warm.

Planning is the key to Milky Way and night sky photography. You are unlikely to get a good night sky or Milky Way shot if the moon is up or if you are near city lights. Check the weather, moon rise and set and the phase of the moon before you go. Try to shoot when and where it is dark and clear.

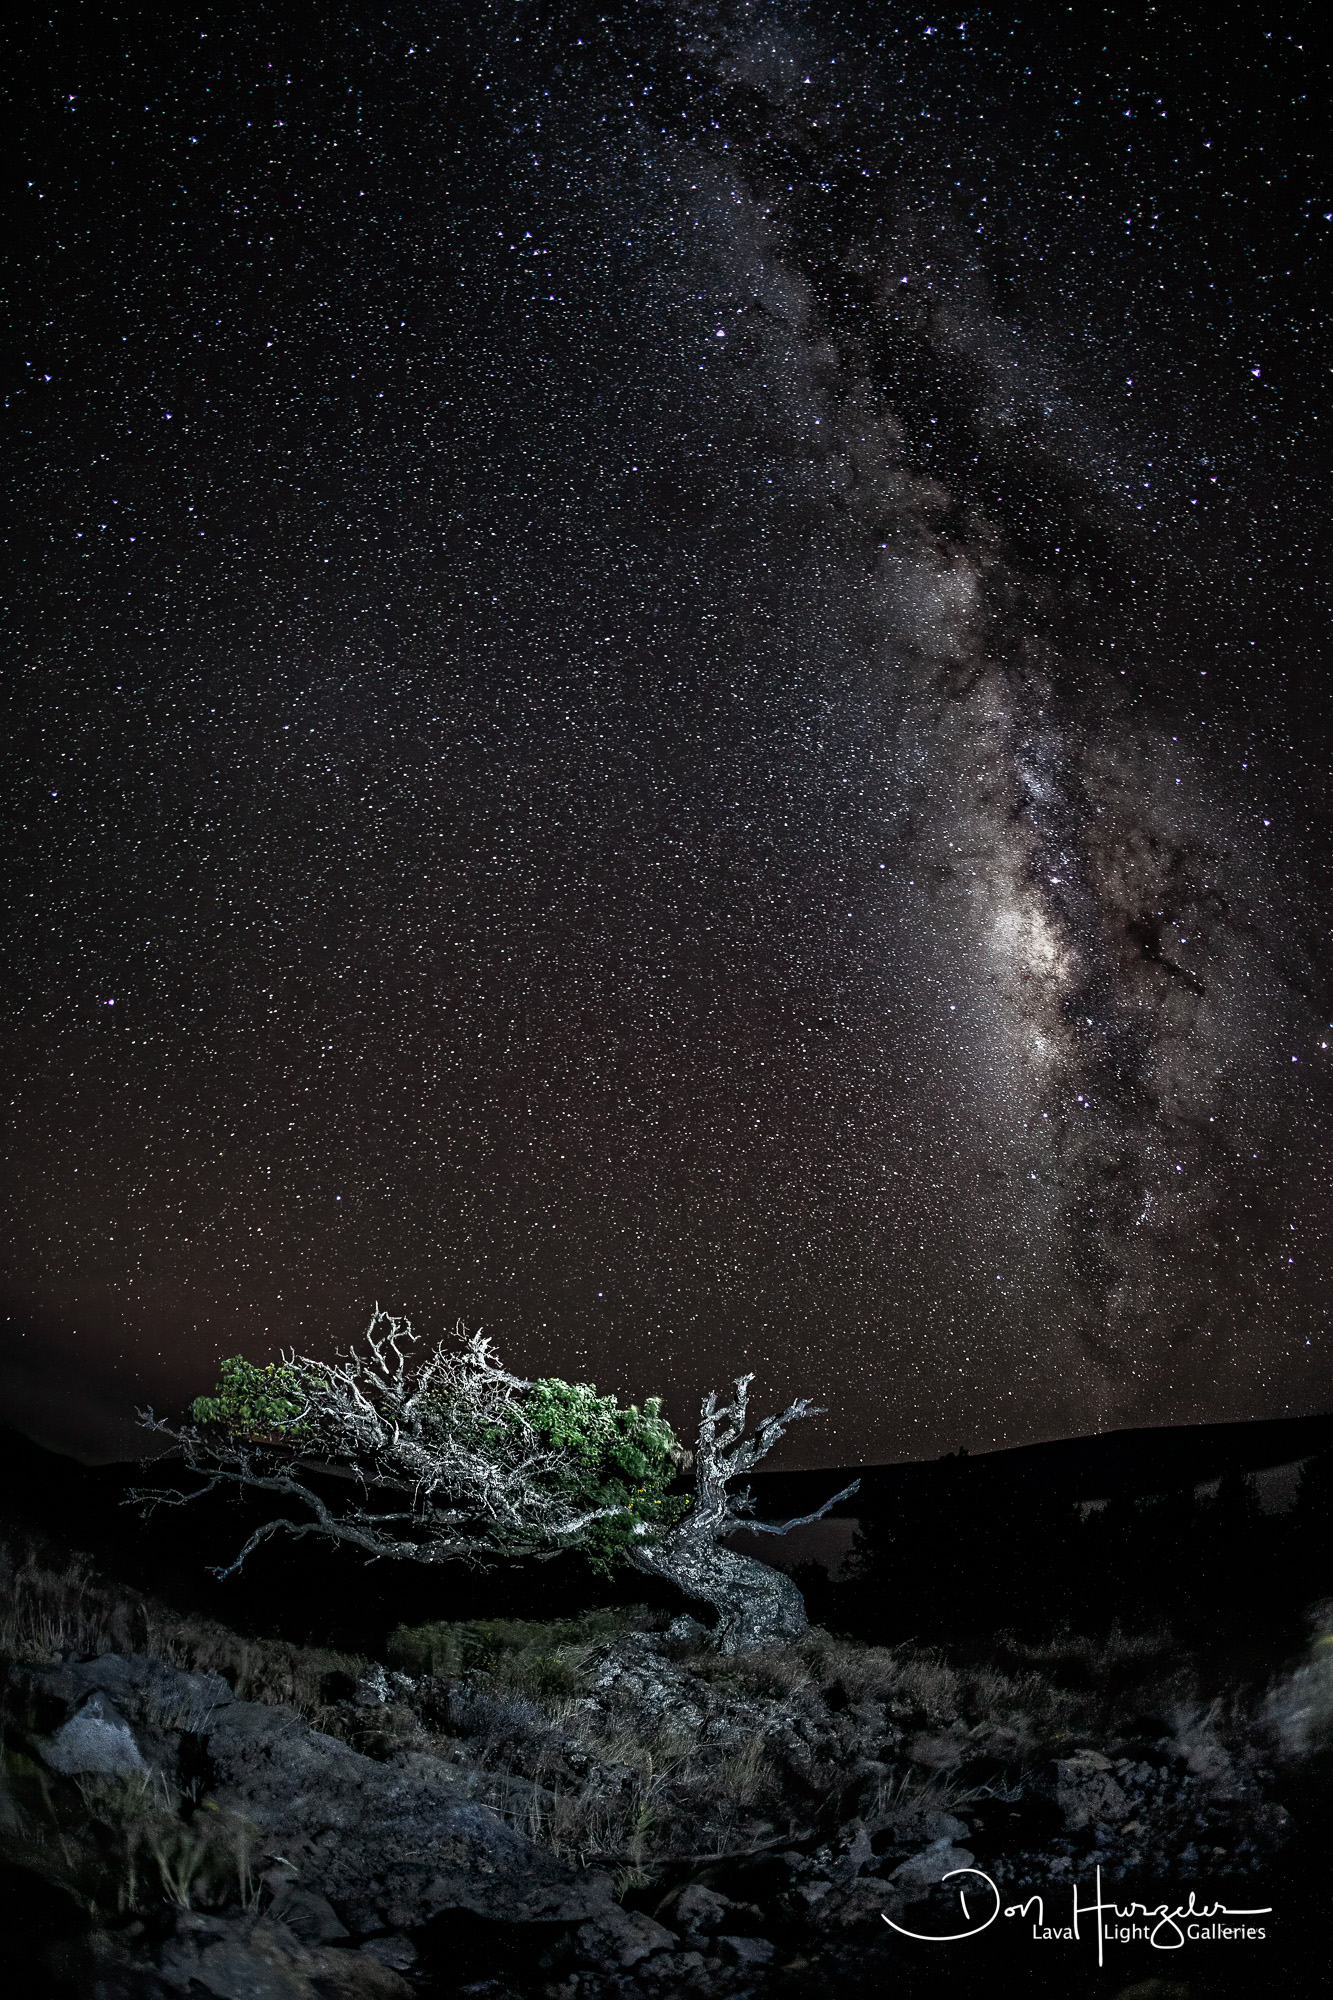
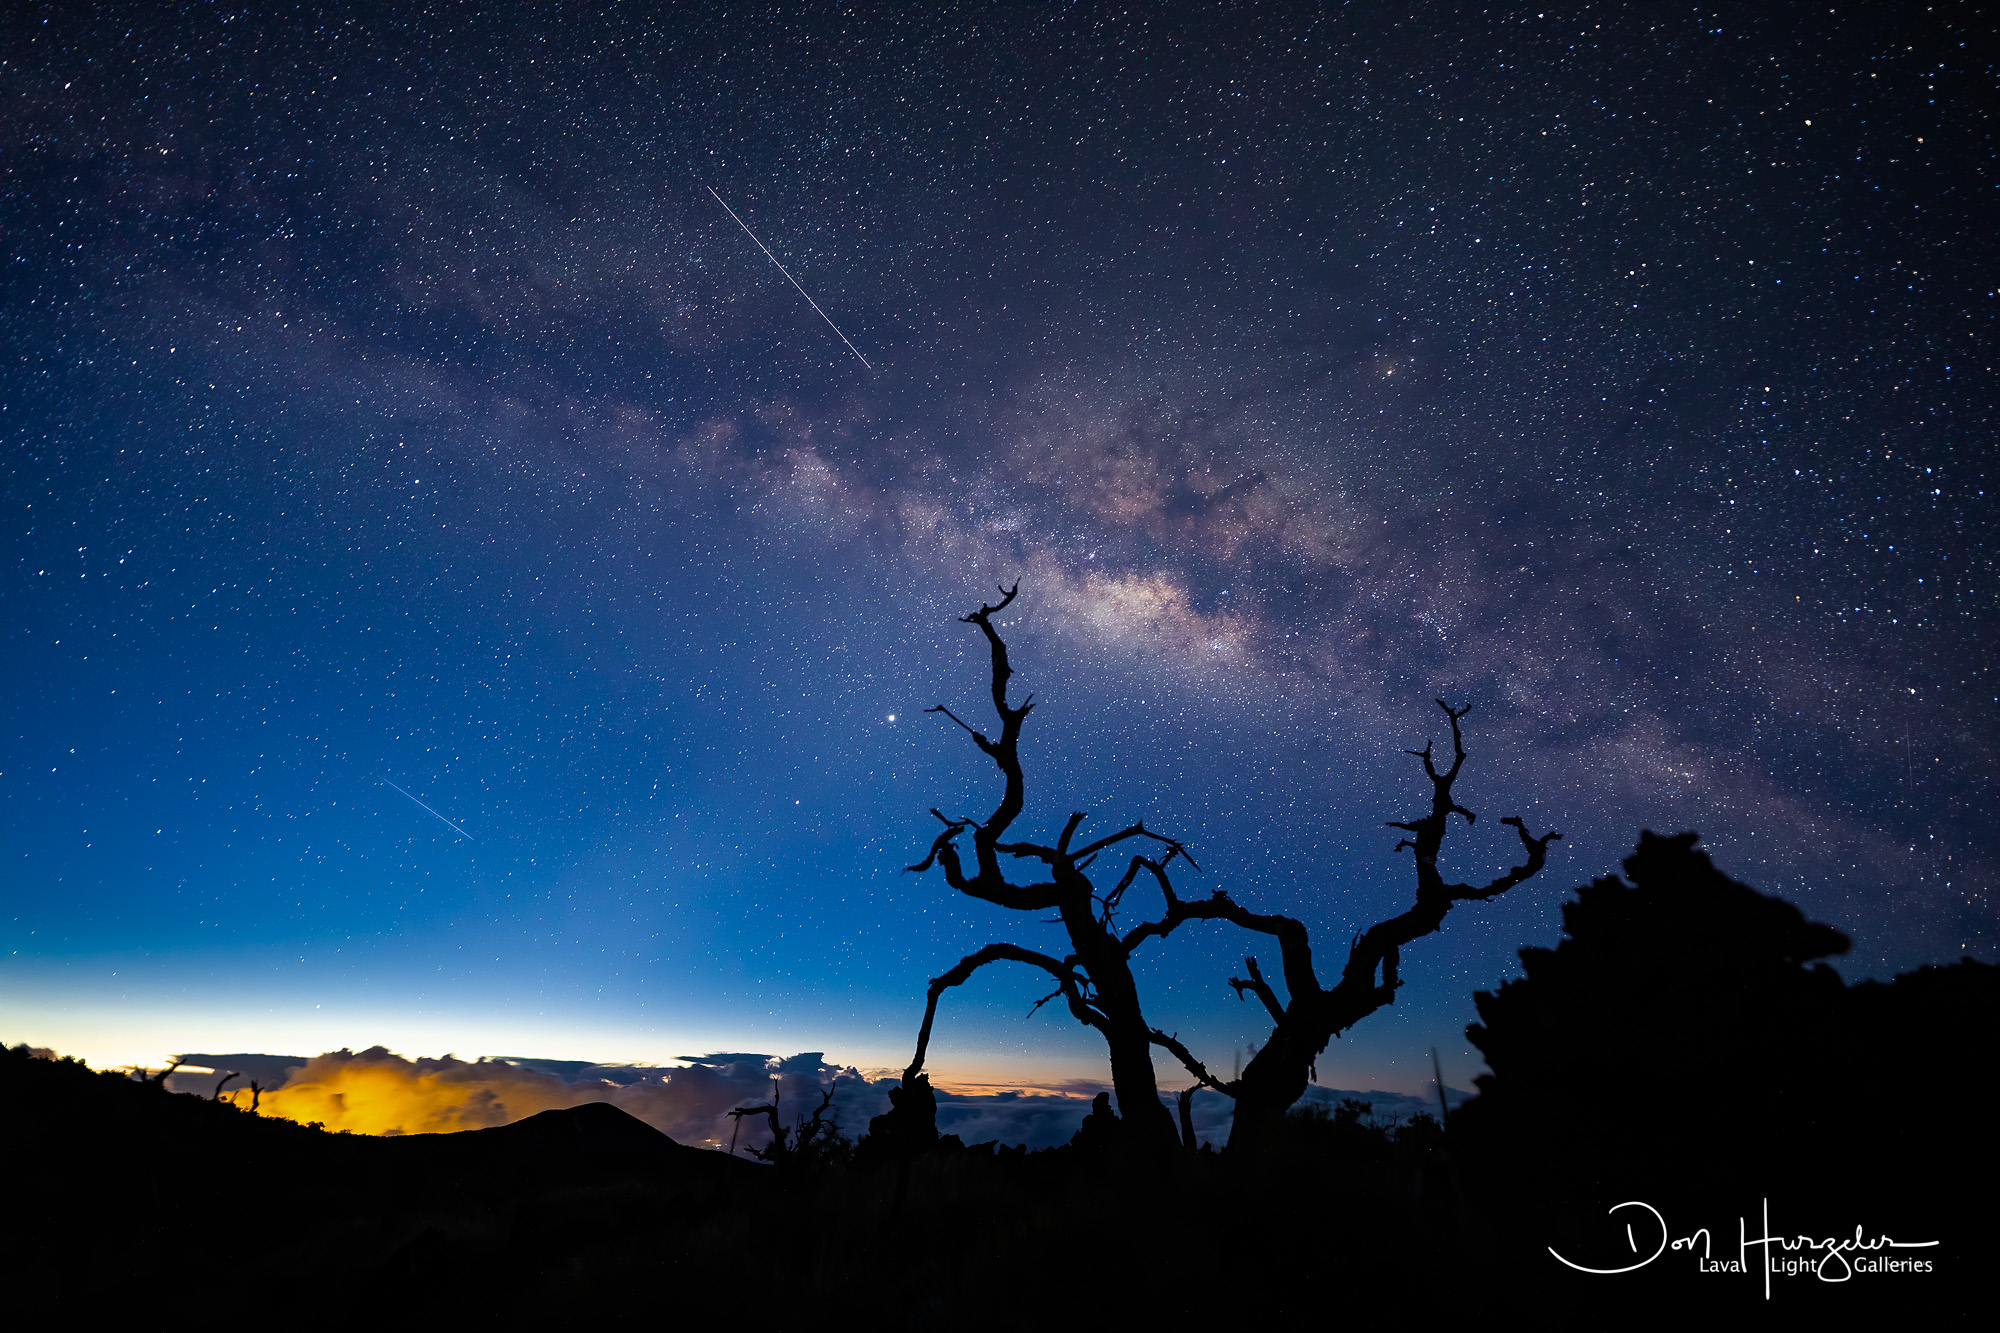
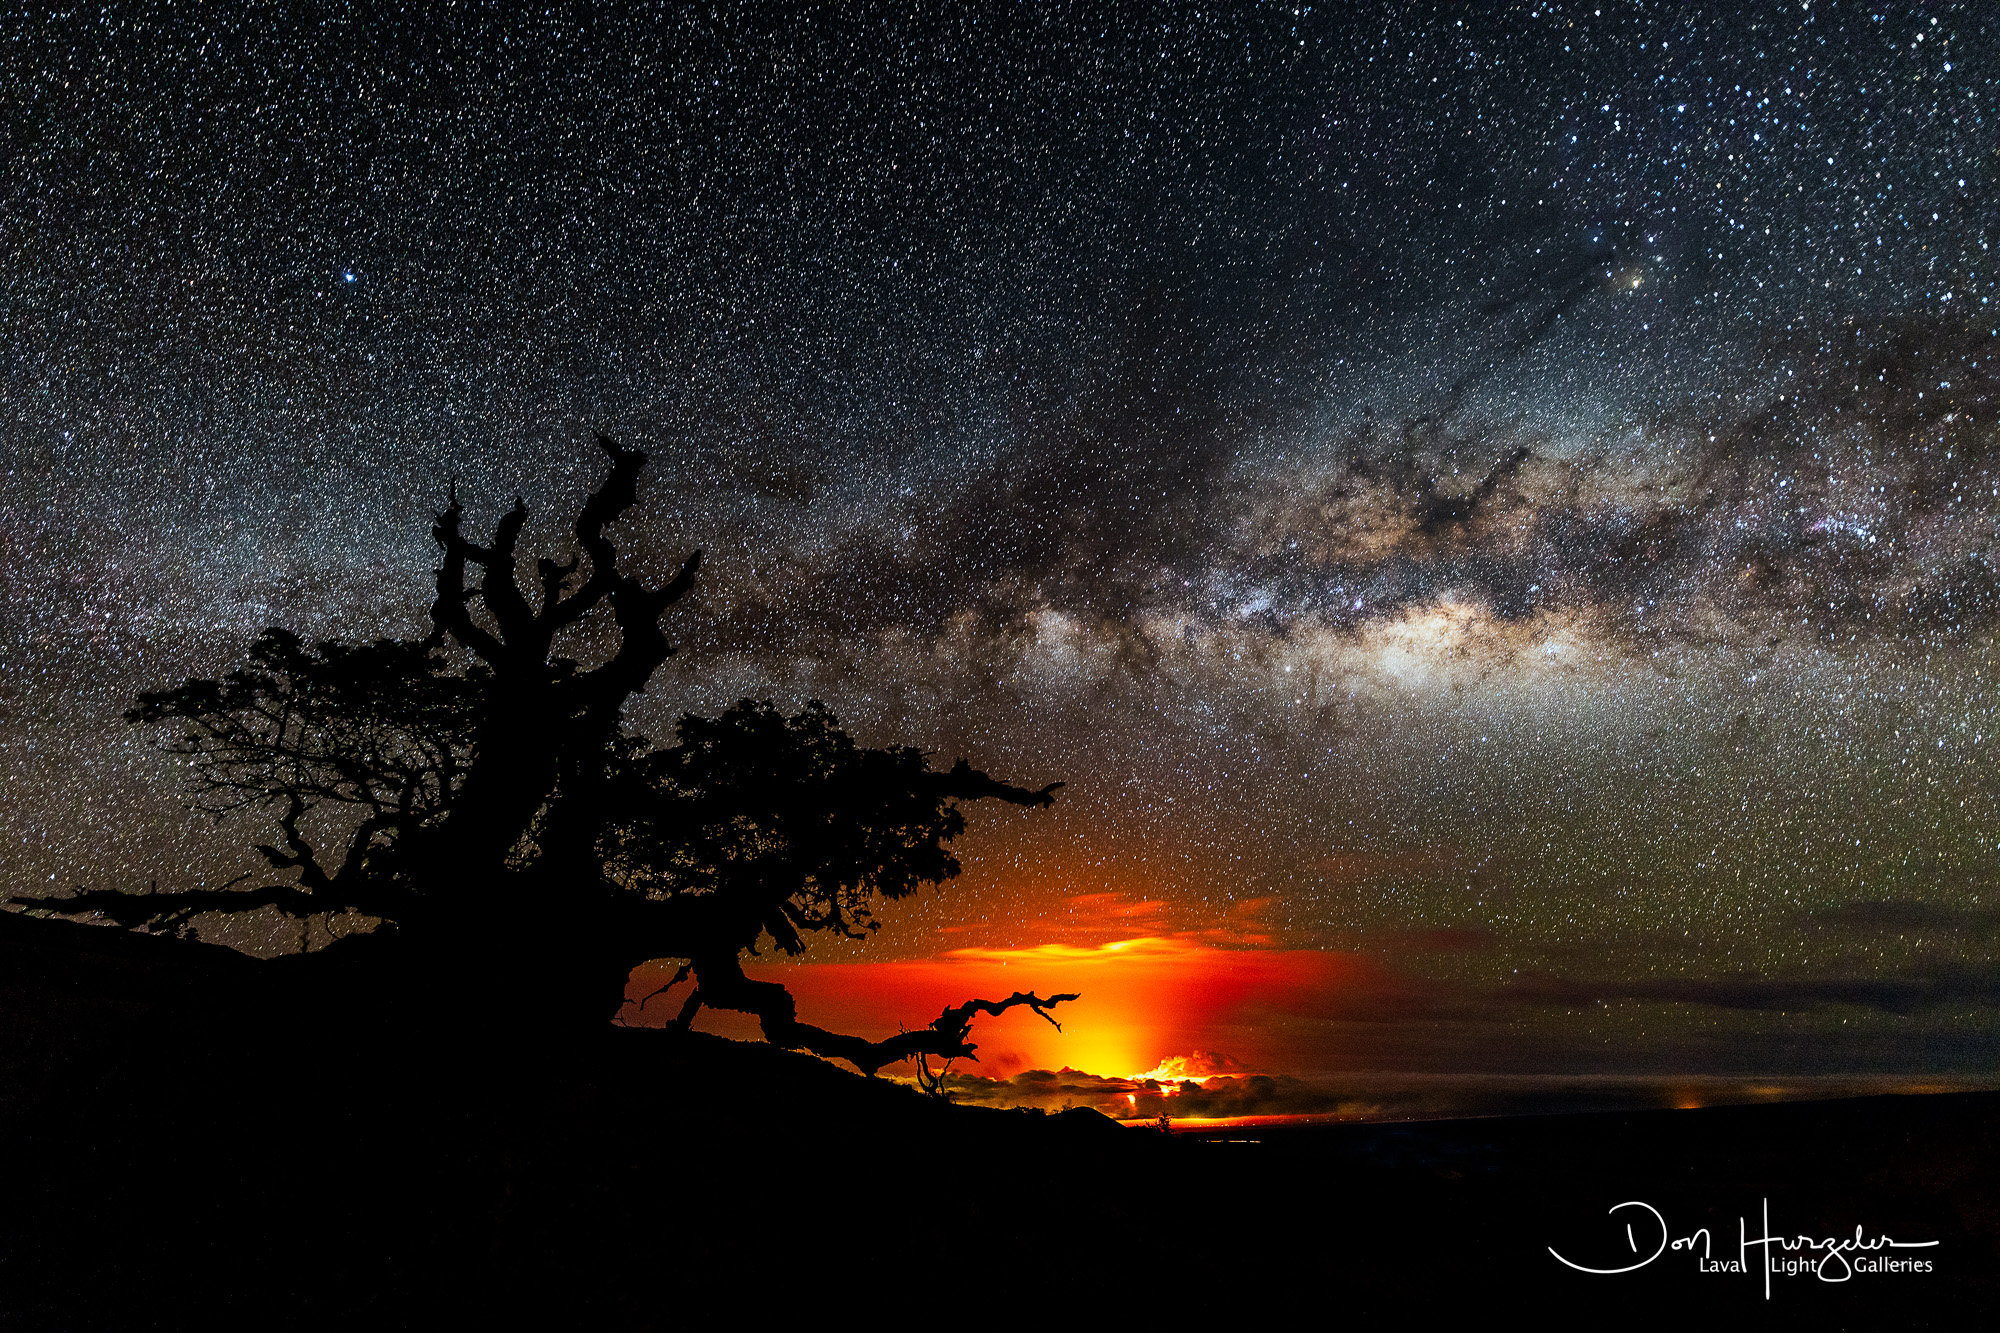
Look up also where the Milky Way will be through out the night. For example…in Hawaii the Milky Way arches over the horizon starting in mid February. By June it is above your head and beautiful. You can continue to shoot it in various parts of the sky through about October…sometimes as an arch and sometimes as a dagger…see the shots below.

If you want the sky to be blue, shoot starting at about an hour prior to sunup. Otherwise, the sky is going to be black.

My basic set up is a wide lens…14 to 16mm and the brighter the better. My current favorite is a Canon 14mm f/1.8…it is a beauty. I put that on a Canon 5D Mark 4 or I shoot at 16mm on a Sony a7R4. Those model numbers are about obsolete the moment I hit the “Post” button…but they are fairly high megapixel cameras that have good dynamic range. Just saying…the better the camera, the better the shot…if you set it up right.

I am 100% of the time on a tripod. I also use a cable release so I can not shake the camera when I hit the button and also so I can lock that in to take one photo after another. We do that often to increase our chances of getting a meteor in the shot.

I shoot anywhere from 30 seconds down to 10 seconds, almost always wide open…in the case of my f/1.8 lens I shoot it at 1.8. I shoot at ISOs of 800 to 3200…with most of my best photos coming in the 800 to 1600 ISO range.

I place my remote trigger on two second delay to take out as much shake as possible.

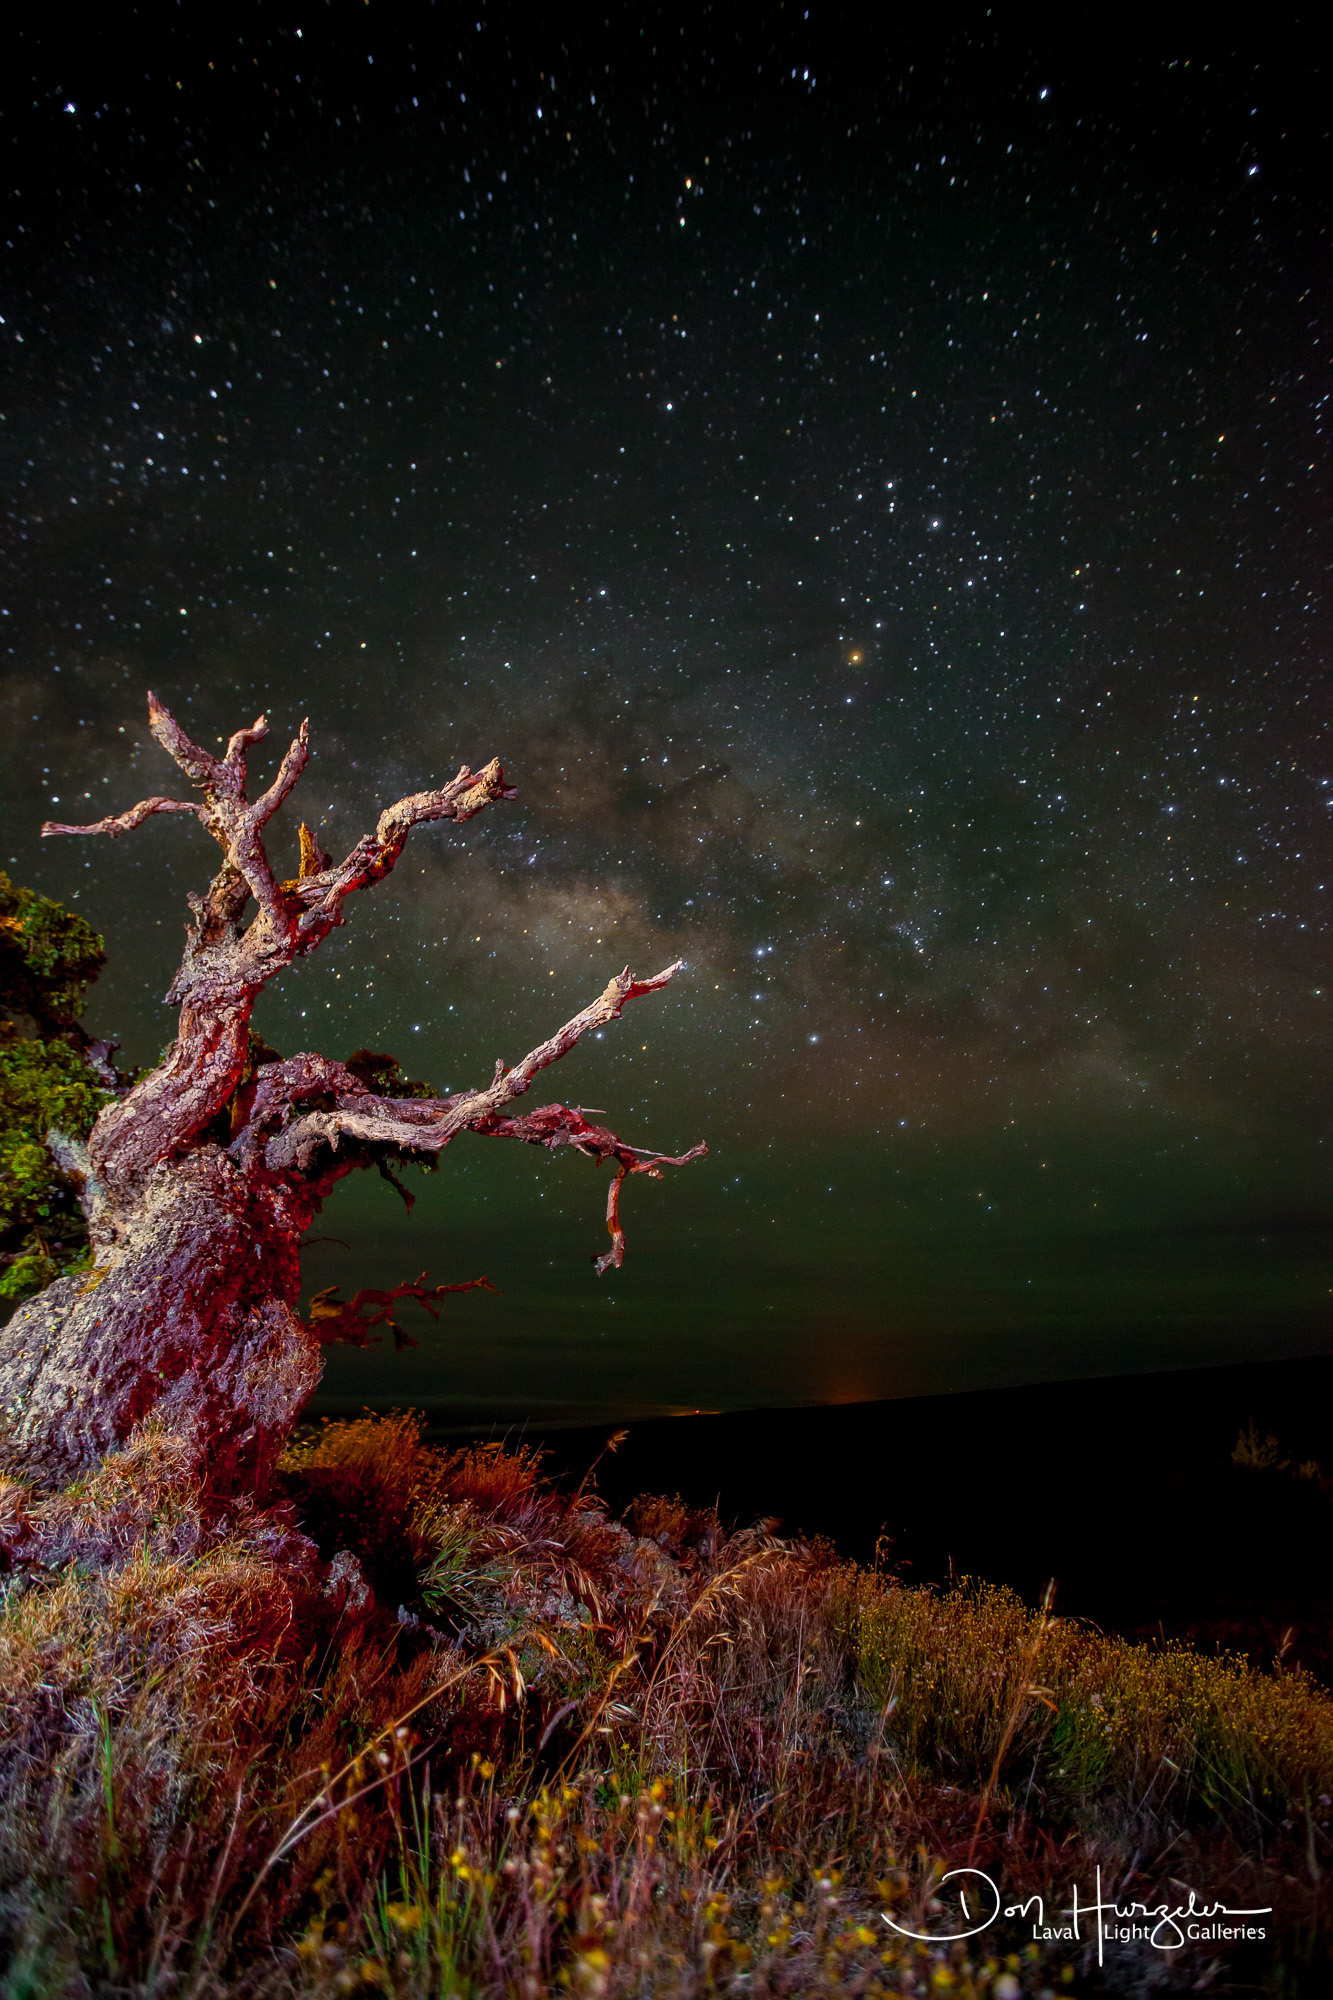
By far the trickiest part is to set your self up with perfect focus. It will be too dark to auto focus, so I chose a foreground element, like a tree or rock, that is maybe 20 feet away..light it up with a flashlight and get perfect focus with either auto or manual focus…and then lock in that focus setting by pulling the little lever back to Manual focus…so I does not change the focus on you. Experiment with that…you want the foreground element in focus but you REALLY want the stars to be in pin point focus. Takes some experimenting.

Some hints that make all the difference…all learned the hard way…

-clean the front glass on your camera often during the night. Water accumulates on it and turns your photos to look out of focus. The wetter the evening, the more you want to clean that front glass.

-look carefully at your image after you took it…blow it up and check out the focus. I do that about every fourth shot. I have whole evenings ruined because I thought I was in focus and I was not. Find out while you are still in the field and adjust as needed.

-there is no perfect set up. Experimenting is the key. I shoot a variety of settings during an evening, just to learn what they will do. Over time you will zero in on a few that work best for your conditions.

-Don’t shoot over 30 second exposures unless you have a fancy set up that follows the star movements. Over 30 seconds and your pin point stars start to look like commas.

-be considerate of others near you. Don’t wave around a laser. Don’t wave around a flashlight or your head lamp. Don’t think your red light will be ok in the shots of others. Do communicate out there “Hey, is anyone currently shooting?”

-Try not to move around much. Where I shoot it is as dark as the inside of a cow. I have seen or caused countless tripods and cameras to crash to the ground…each one an expensive and maddening experience.

-Try to get at least 100 shots for the evening. They will not all be winners. Change the composition from time to time.

-I never use a flash on a night shot…but might strobe or light up a foreground element with a flash light. Take experimentation and coordination with those around you. Try it. The vertical shot below is an example of one I lit up with a flash light and it won me First Place in big contest by Outdoor Photographer Magazine.

-Shots that just show the sky…worthless to a landscape photographer. Have some foreground element in the photo…something that is not going to wave around much if the wind is blowing. Leafy trees…not so good. Dead trees…now we are talking.

I will touch on editing night shots next post. Aloha.

Lava Light Lesson #33…Reducing Shake in a Long Exposure Photo

I will do an article on night photography soon. In the meantime, I am often shown night sky photos where the stars are not exactly pinpoint…they look more like commas than periods. Here are a few simple things you can do to get the stars to be absolutely pin point even on a long exposure.

-Use a remote cable or wireless trigger to start your shot. Even touching your camera to start the shot may cause a bit of wiggle and smudge those pin point stars you want to capture.

-Use a two second delay to take the shot. So…I press the button on the remote and it presses the camera to start the shot…but I have that shot on a two second delay so it is dead still when the shutter opens.

-The shorter the shot you can use to get your shot the better. A typical Milky Way shot might be 10-30 seconds. Most of mine are at about 20 seconds. The less time the shutter is open, the less likely you are to have any wind blown wiggle. If you are thinking about shooting for a full thirty seconds…try it at 25 seconds and see how it looks…it should look fine and you will have reduced the chances of star field wiggle by a significant amount.

-Do not shoot longer than 30 seconds unless you are shooting star trails or you have a mount that will track the stars. 31 seconds and you start to get that comma look in your stars.

-Always use a sturdy tripod. Flimsy cheap tripods blow around in the wind and that shows up in your shots.

-The lower to the ground the tripod is…the less it is likely to blow around.

-Try to find a way to lessen the wind hitting your camera and tripod…maybe shoot over a rock or whatever. We look for wind protected areas to shoot.

-Some people hang heavy weights from the middle of the tripod to increase the stability. I use to do that before I dropped that heavy weigh on my toe in the dark. I don’t do that anymore.

-And there are two more likely suspects when your stars are not coming out pin point…focus and moisture on the lens. Focus is critical. Make sure your first few test shots are looked at carefully…fully magnified when you review them to make sure you really do have sparkling focus on both your foreground element (like a tree or a rock) and the stars themselves. If the stars are not perfectly round…re-focus…and check that focus from time to time during the evening…lenses can get batted around a bit as you move and you might just move the focus ring by mistake.

If you are shooting up high or near water or in misty weather…bring along a microfiber cloth or ChemTech tissue to clean/dry the front of your lens every several shots. I have “lost focus” in the middle of a shoot strictly from mist building up on my lens.

Oh…and one last thing. We often shoot in an area where the clouds eventually roll in. Before the clouds arrive…the moisture arrives. It may be up high and, as such, you don’t feel it nor is it getting on your lens…but it is obscuring your shot. So…if you can not quite figure out why your most recent shots are no longer in focus…suspect the moisture in the air and maybe move higher on the mountain or away from the incoming moisture.

The following photo is what the stars should look like in a long exposure…not commas or little deltas…pin points.

Hope that helps. Aloha.