The last blog covered photographing waves above the water. This one will explain photographing waves under water.
The interesting part of a wave under water is the tube of the wave. When waves break, they either crumble from the top and turn into white water immediately that then rushes to the shore. Or…the top of the wave throws out ahead of the rest of the wave, traps air in a cylinder…the tunnel of the wave. That cylinder continues to roll toward the beach as an intact cylinder for a short period of time. During that time, the front and back of that cylinder are often mirror like…sometimes appearing to be silver in color. The surface of the cylinder can be clear enough to see a surfer inside the cylinder or to see all the way through it to the beach. You only see this if you are underwater, with googles or a facemask on…or with your eyes wide open and very near the breaking wave. Most people never see it in a lifetime…too busy just trying to negotiate the passing wave and all of its’ chaos.
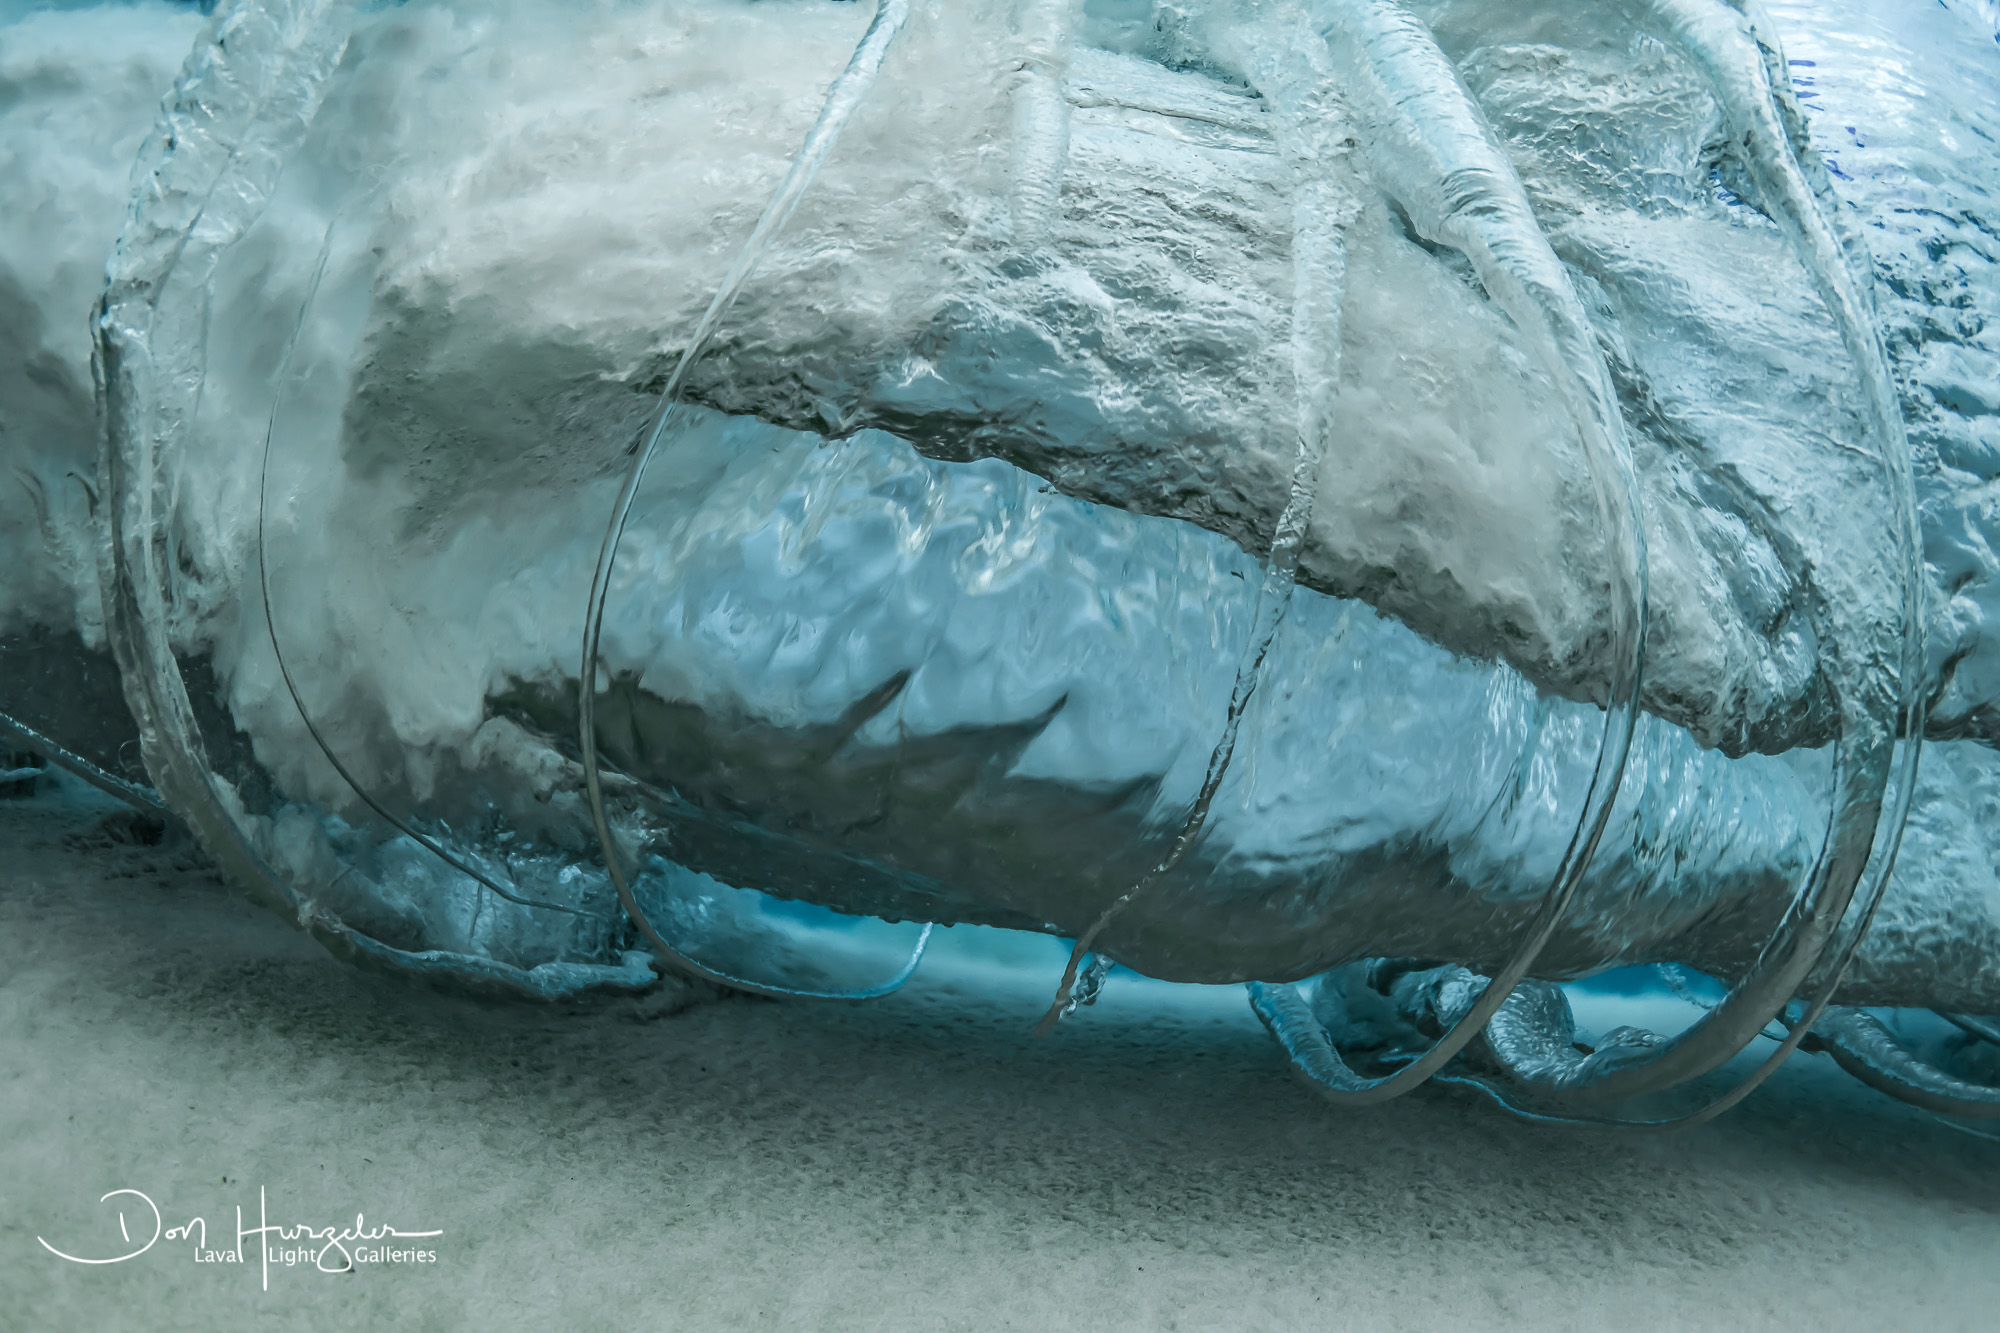
One more thing about the interesting part of a wave underwater…all that air that gets trapped in the tube has to eventually be released. This happens in two ways. The tunnel can just collapse into a mass of white water. Underwater this looks like a depth charge exploded…and it feels that way if it happens right on top of you. Or, the tube can create vortices…tornado looking rings that vent air from the tube to the surface. The rings are just about the coolest things I have ever seen…and they only last for about a half a second and then the tube collapses into that white water explosion. Despite surfing my whole life, I never knew they existed until I started photographing waves underwater about ten years ago. You can not see them from above the water.
Size matters. If the wave is too small it will only crumble from the top and there will be nothing to photograph underwater. Or, if it is too small it will become odd shaped underwater and not an interesting subject. Small waves also tend to break right near the beach…so they often break in water that is saturated with sand suspended in it…and you can’t see or photograph a thing.
Big waves tend to break out in deeper water and churn things up significantly…difficult to photograph and often dangerous, as the bigger waves around here are breaking over coral. There are places around the world where big waves and coral combine to create a breathtaking setting for back of the wave photography…Teahupoo, Tahiti comes to mind.
So, we look for mid-sized waves of two feet to six feet in height. These waves are well shaped and the first wave of a set will usually be in water that does not have a lot of sand stirred up in it.
We shoot wide lenses, typically around 15mm. This means we must be right next to something to get a good shot of it. In the case of a breaking wave we do this one of three ways. As the wave is breaking, we dive underwater about ten feet in front of the breaking wave, hold the camera out to our side pointed at the incoming wave and start firing the camera. If we get lucky, we catch the rings and approaching tunnel of the wave. If we get very lucky, we pass right under that energy and surface on the other side. If we do not get lucky and the tunnel and/or rings hit us…all hell can break loose…which is why we do not have our heavy camera housings right in front of our face.
Or…we position ourselves to the side of the wave, submerge as the wave nears and try to capture the scene from under the tunnel and rings. Much safer and we often get quite interesting shots using this technique.
Or, we position ourselves almost exactly where the wave is breaking, but a little further out to sea. As the wave approaches, we submerge and start firing at the back of the wave as it passes. Most of these shots have too much sand in them to be of use…but every now and again you get one that is crystal clear…and those are the winners.
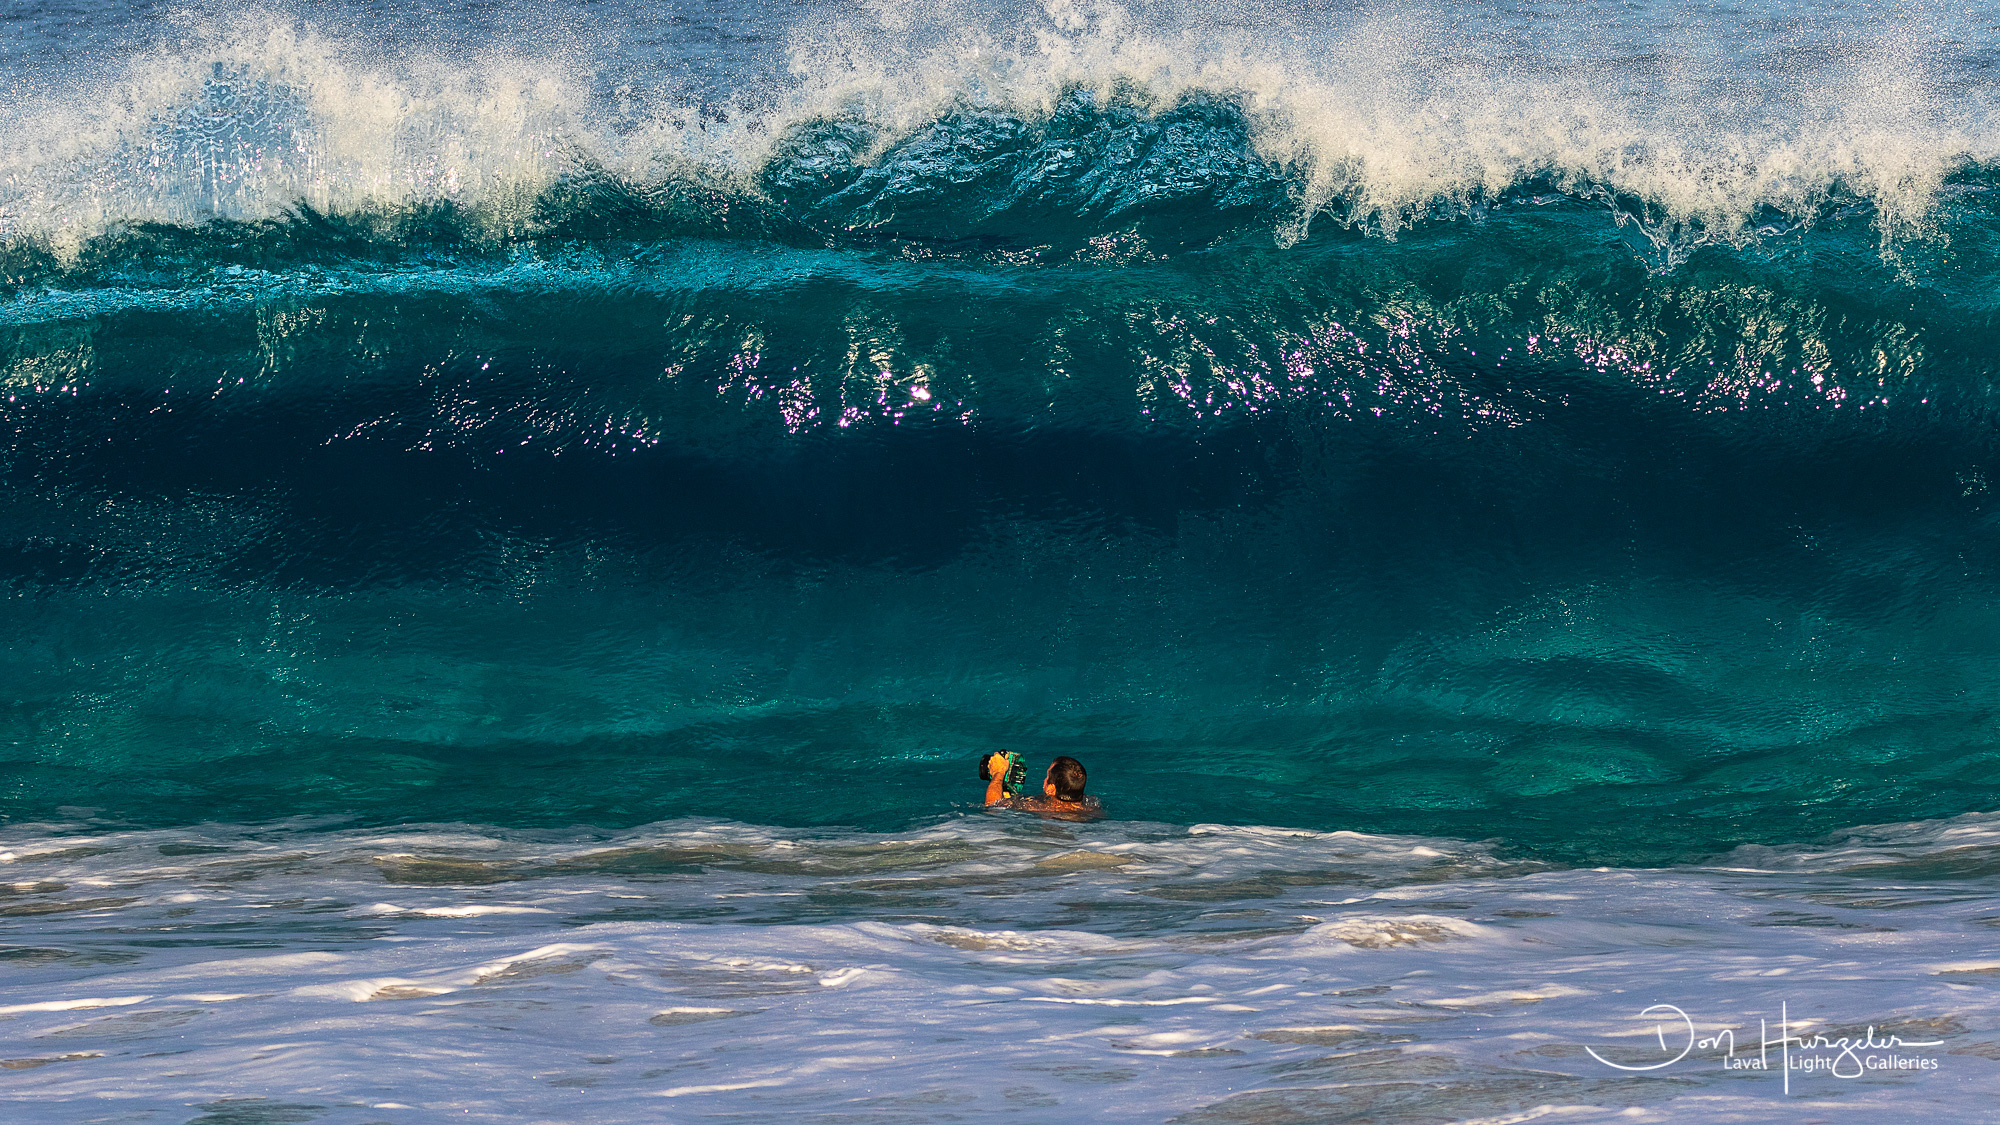
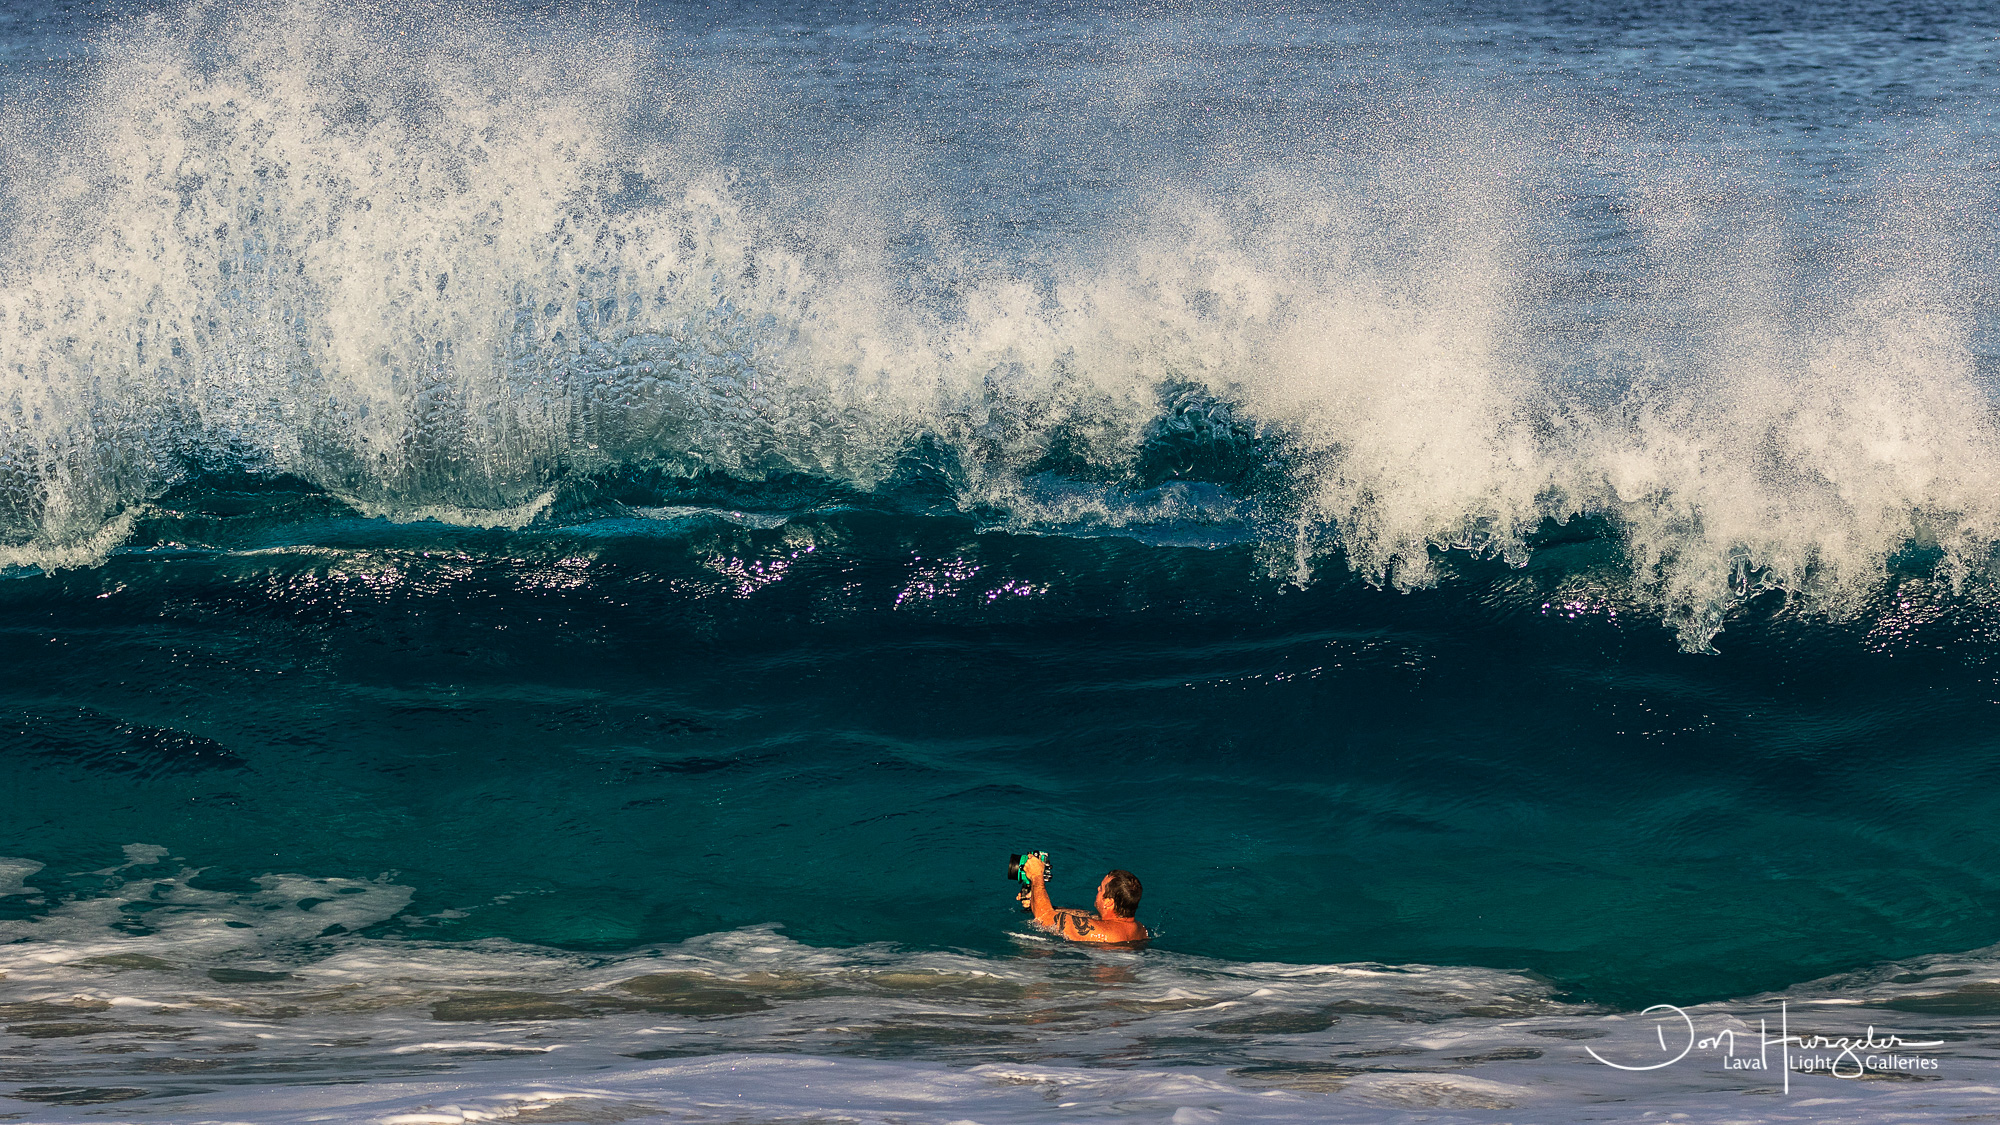
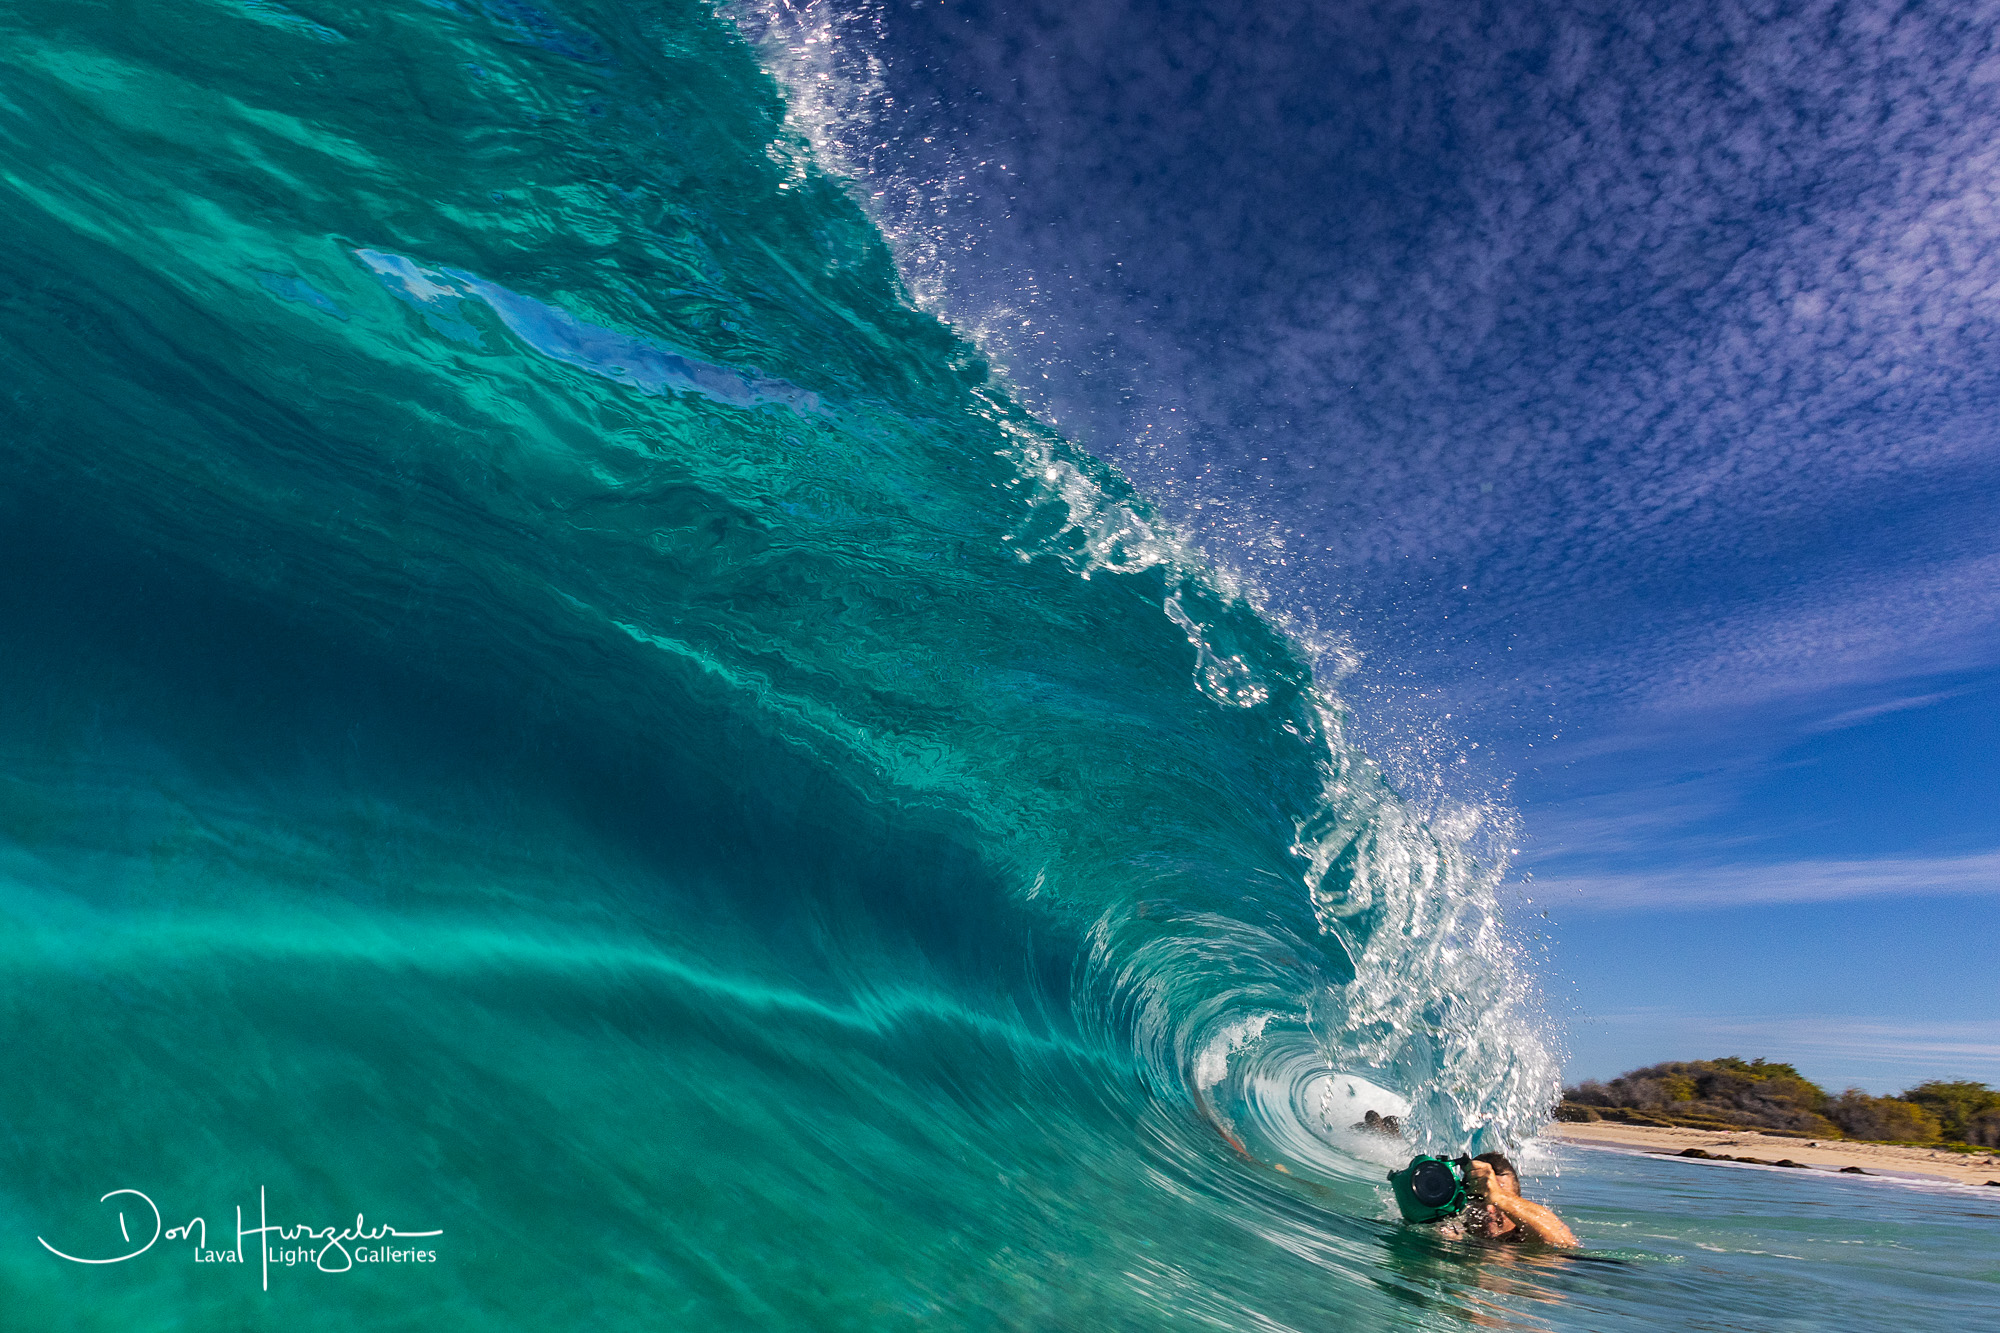
The first photo is of a good sized wave rolling right at me…showing the tunnel and rings of that approaching wave. It may look further away because I am using a fisheye lens that distorts distances a bit…but I promise you that shot was taken from no further than five feet away from that incoming bomb…and since it goes all the way to the sand, it ate me up.
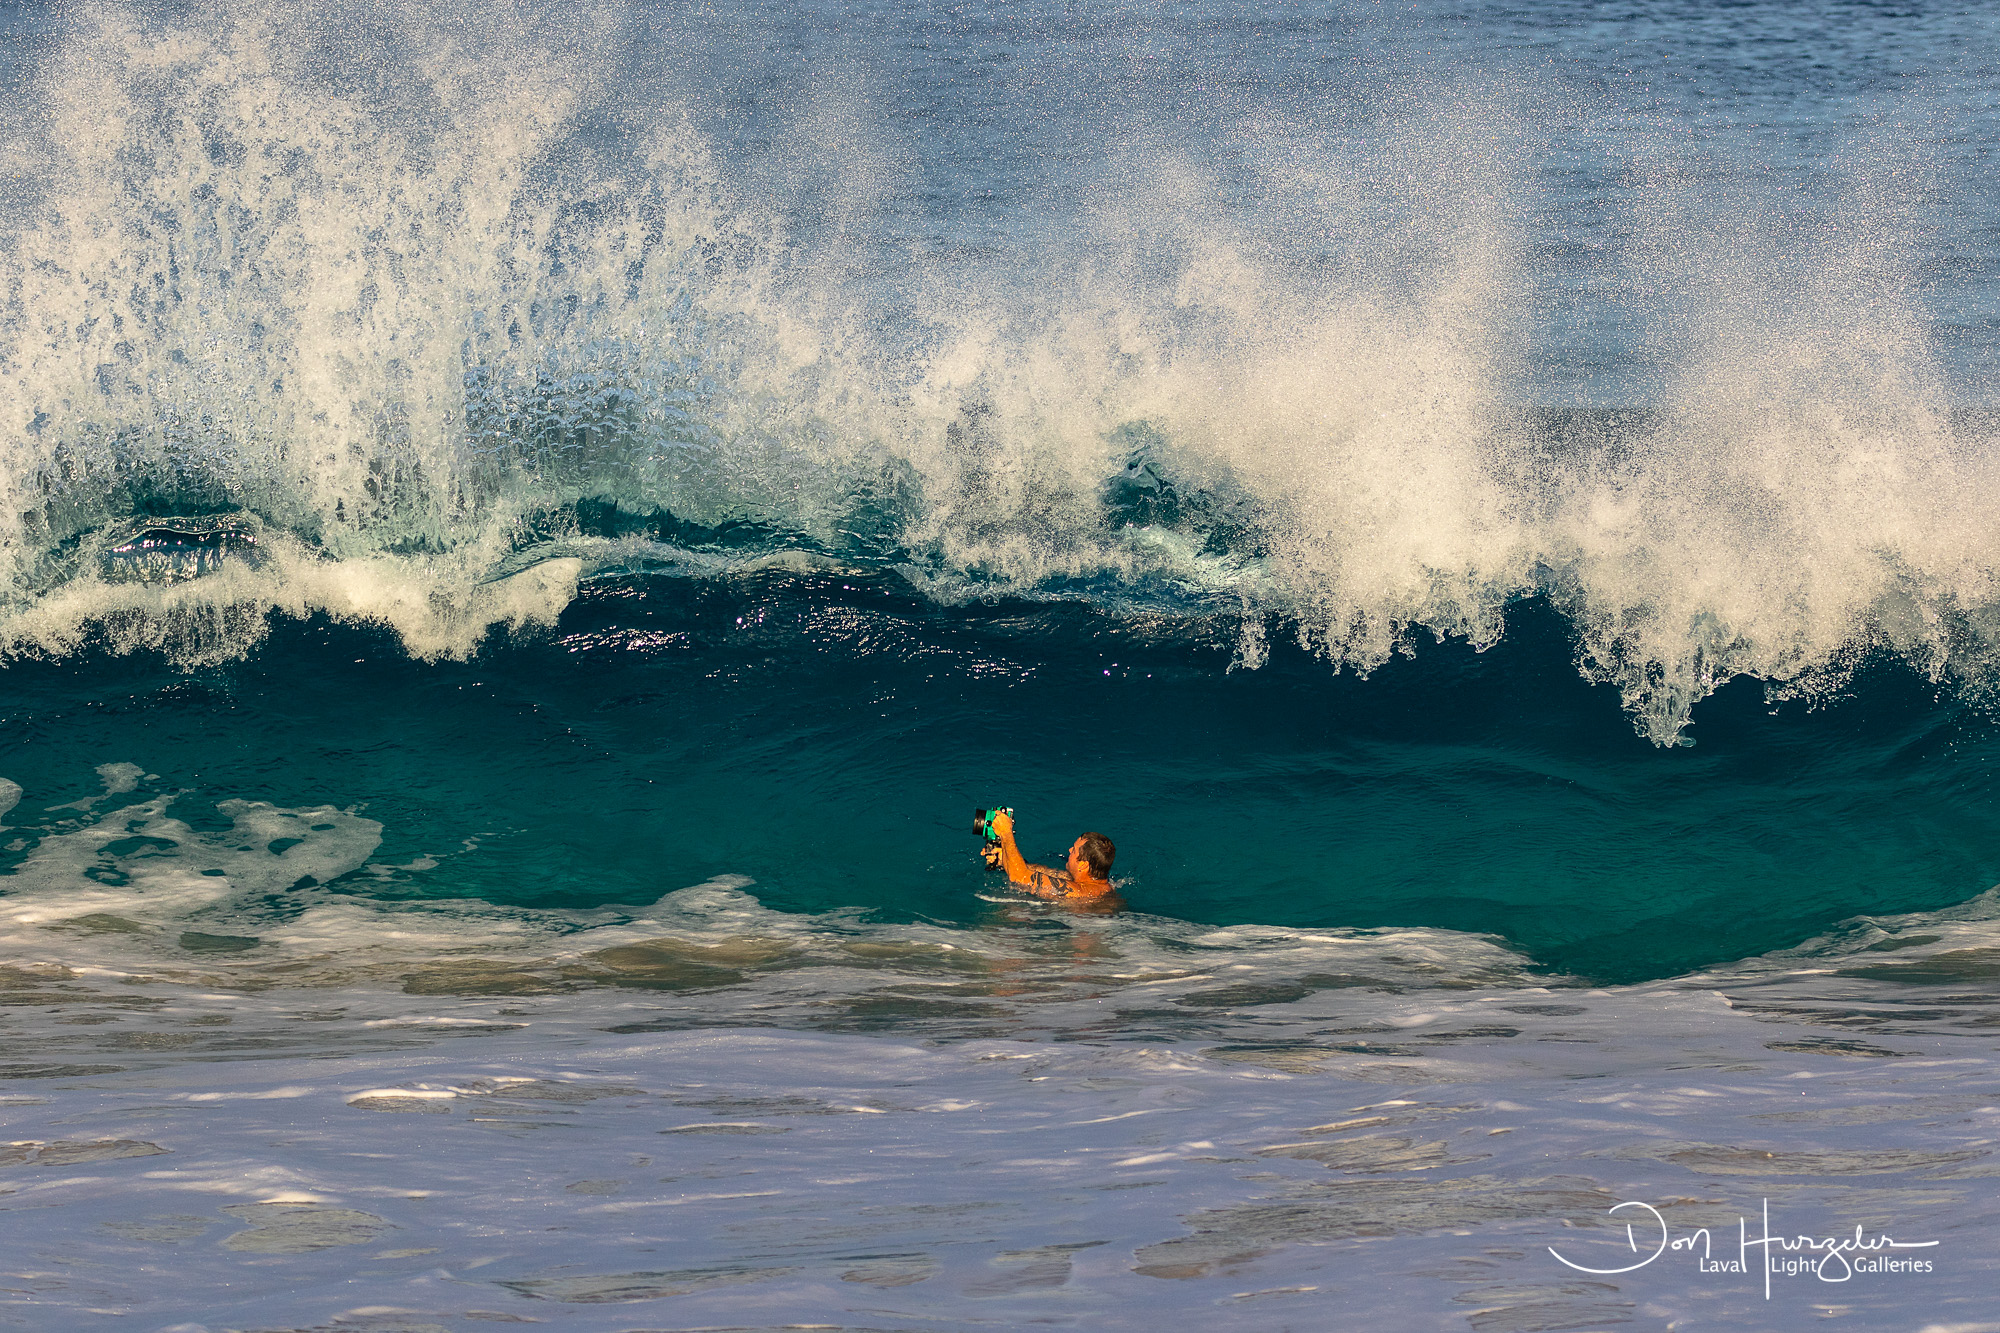
The second photo shows what those rings look like from the side, as a buddy of mine and I try to get under them. We did not get under them and it violently spun us around like rag dolls.
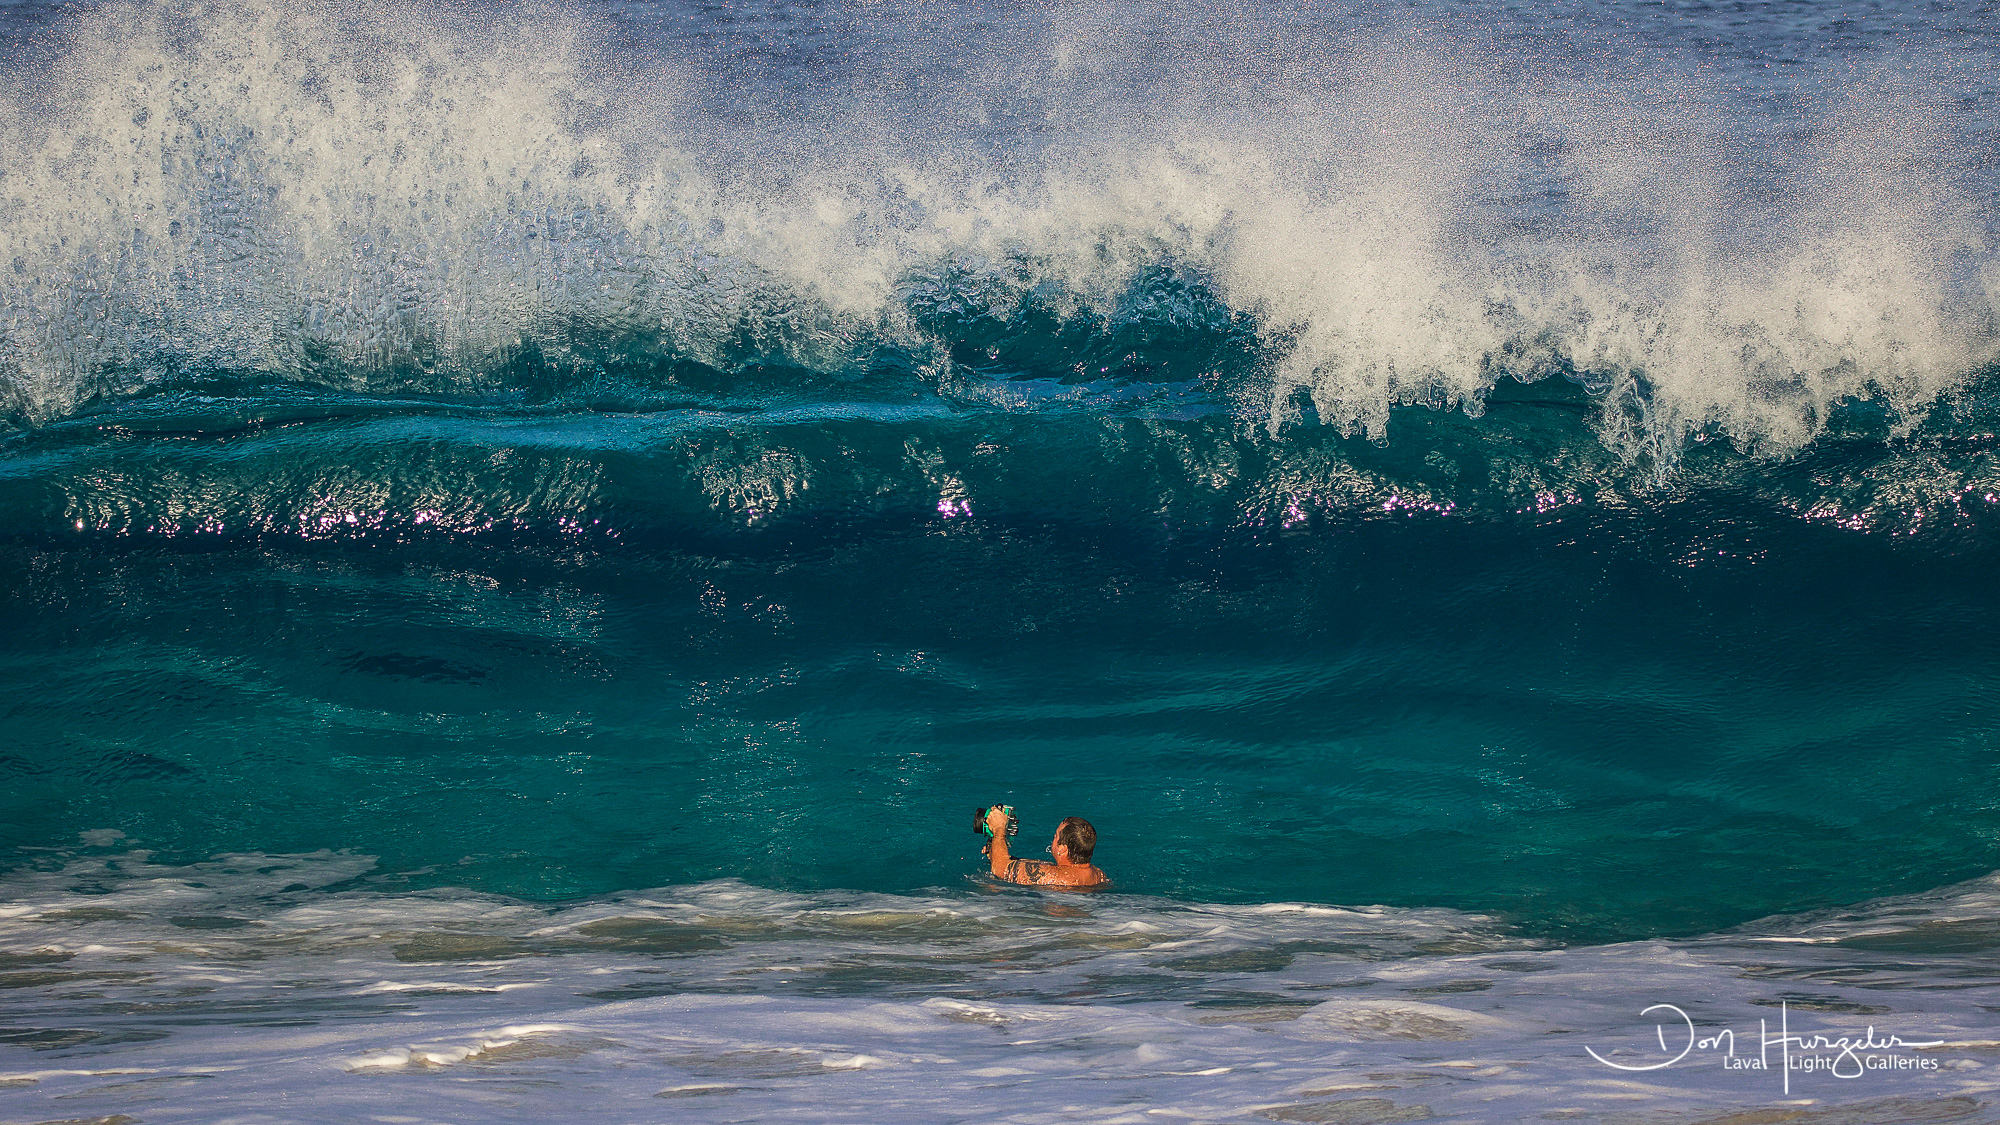
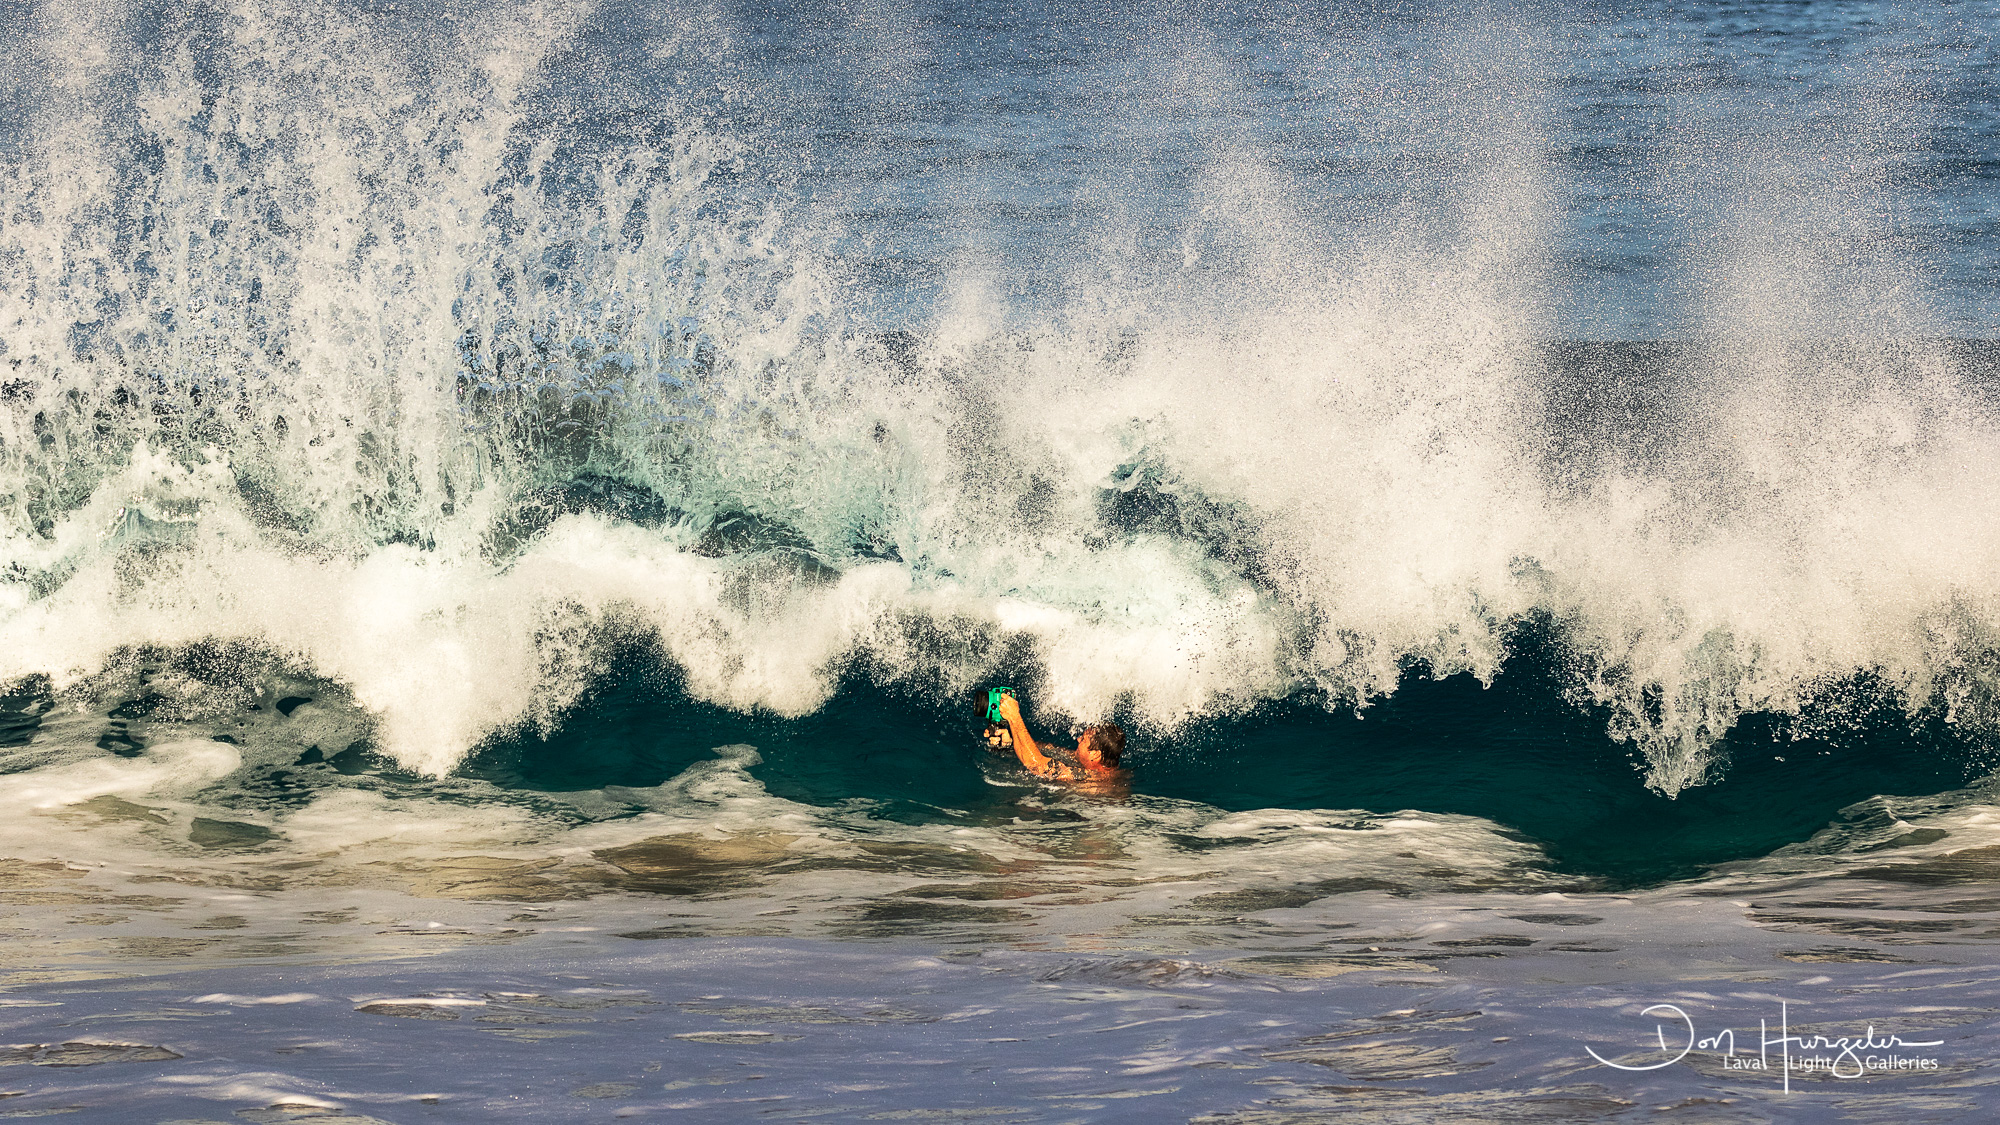
The third photo shows the typical thing you see underwater, the wave collapsing into a white water explosion that the swimmer is about to encounter. Looks like there was just enough room to get completely under the exploding section of collapsing wave.
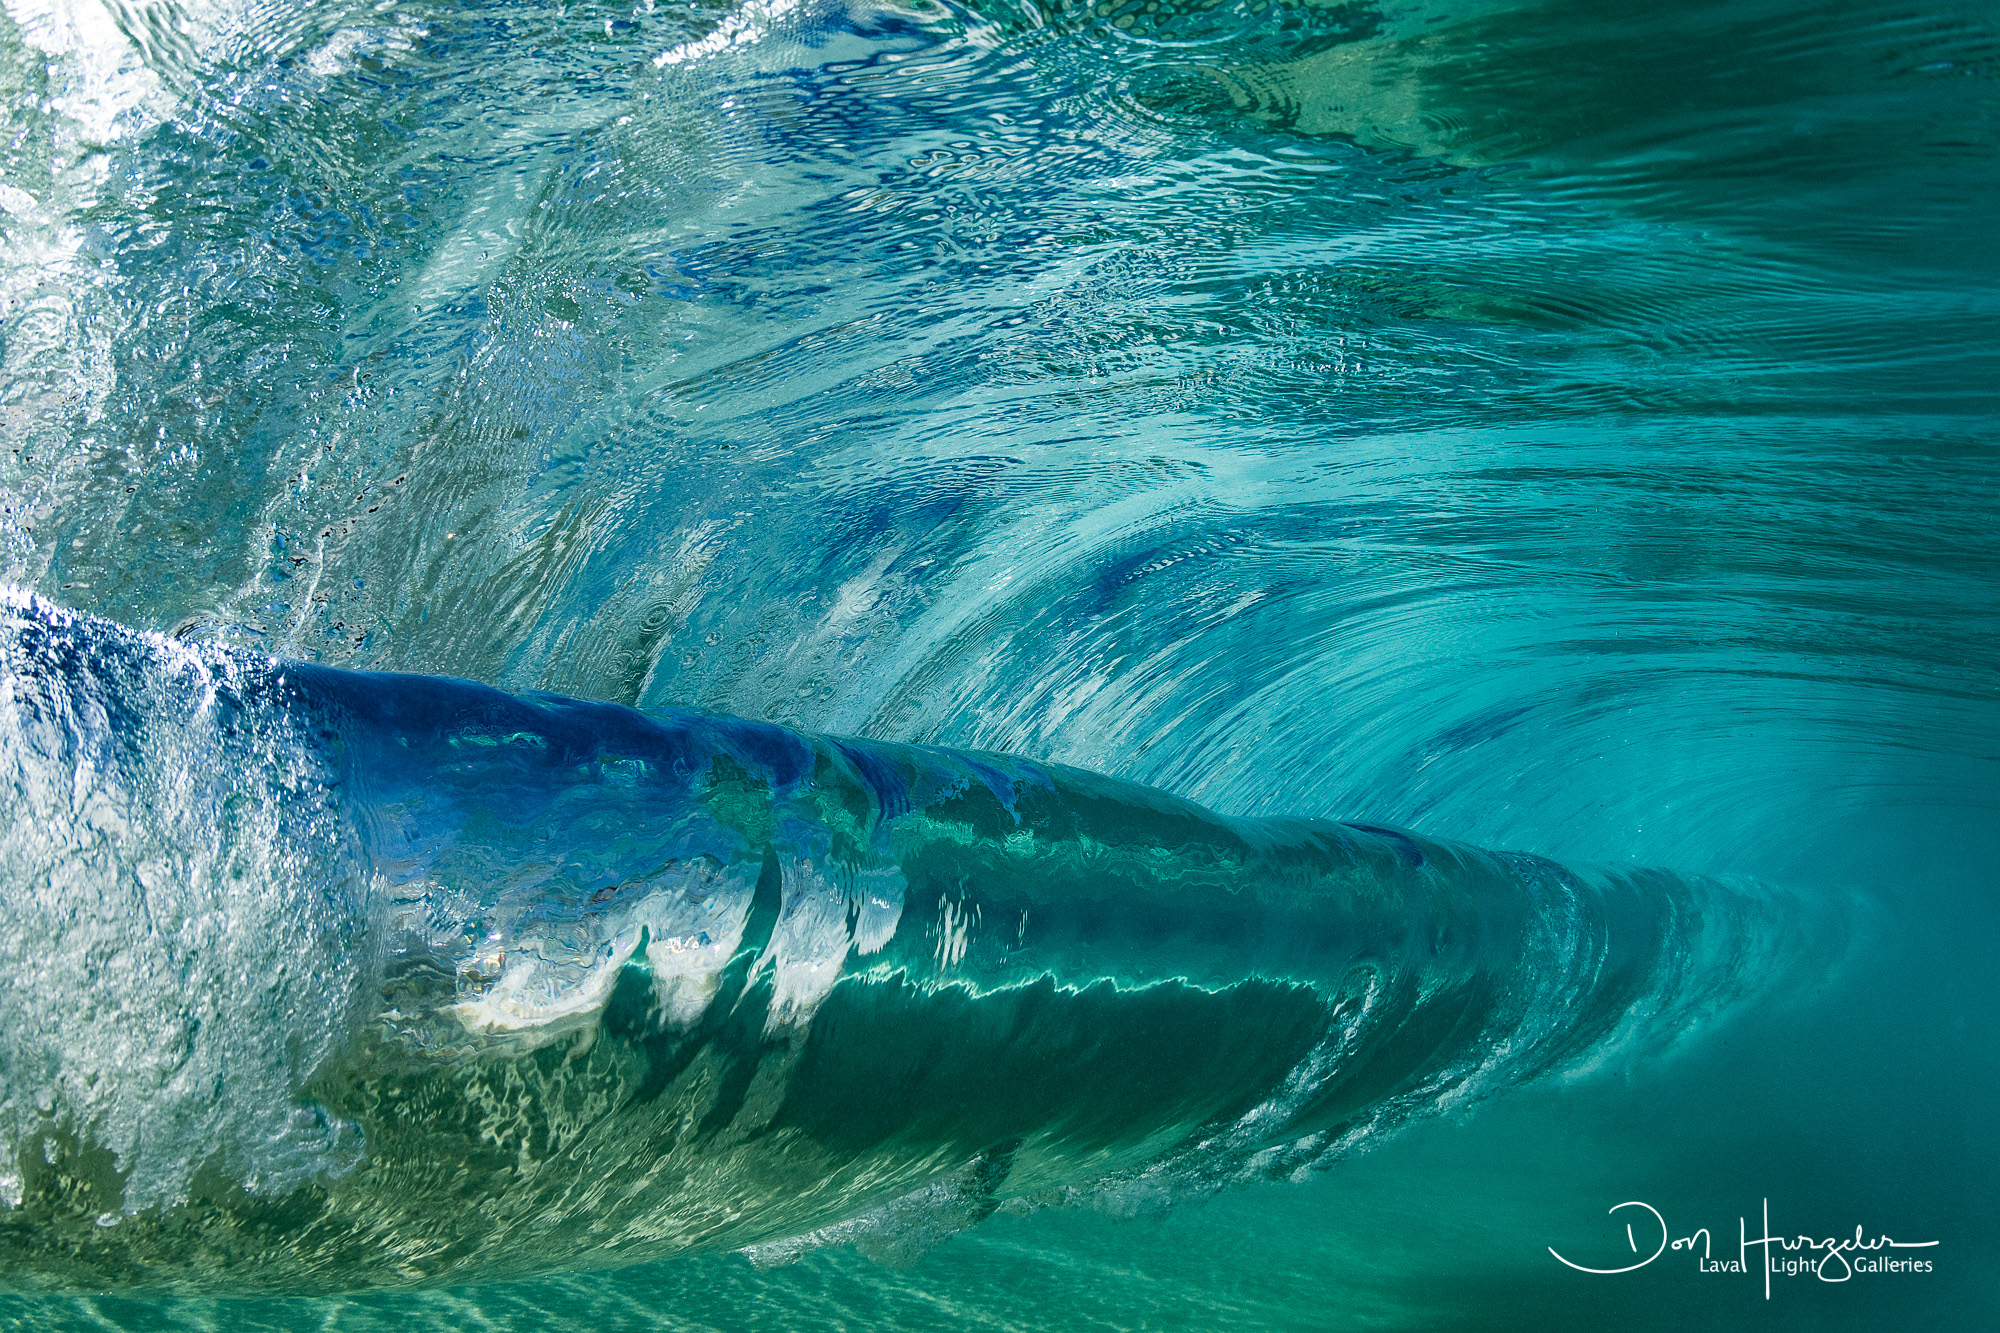
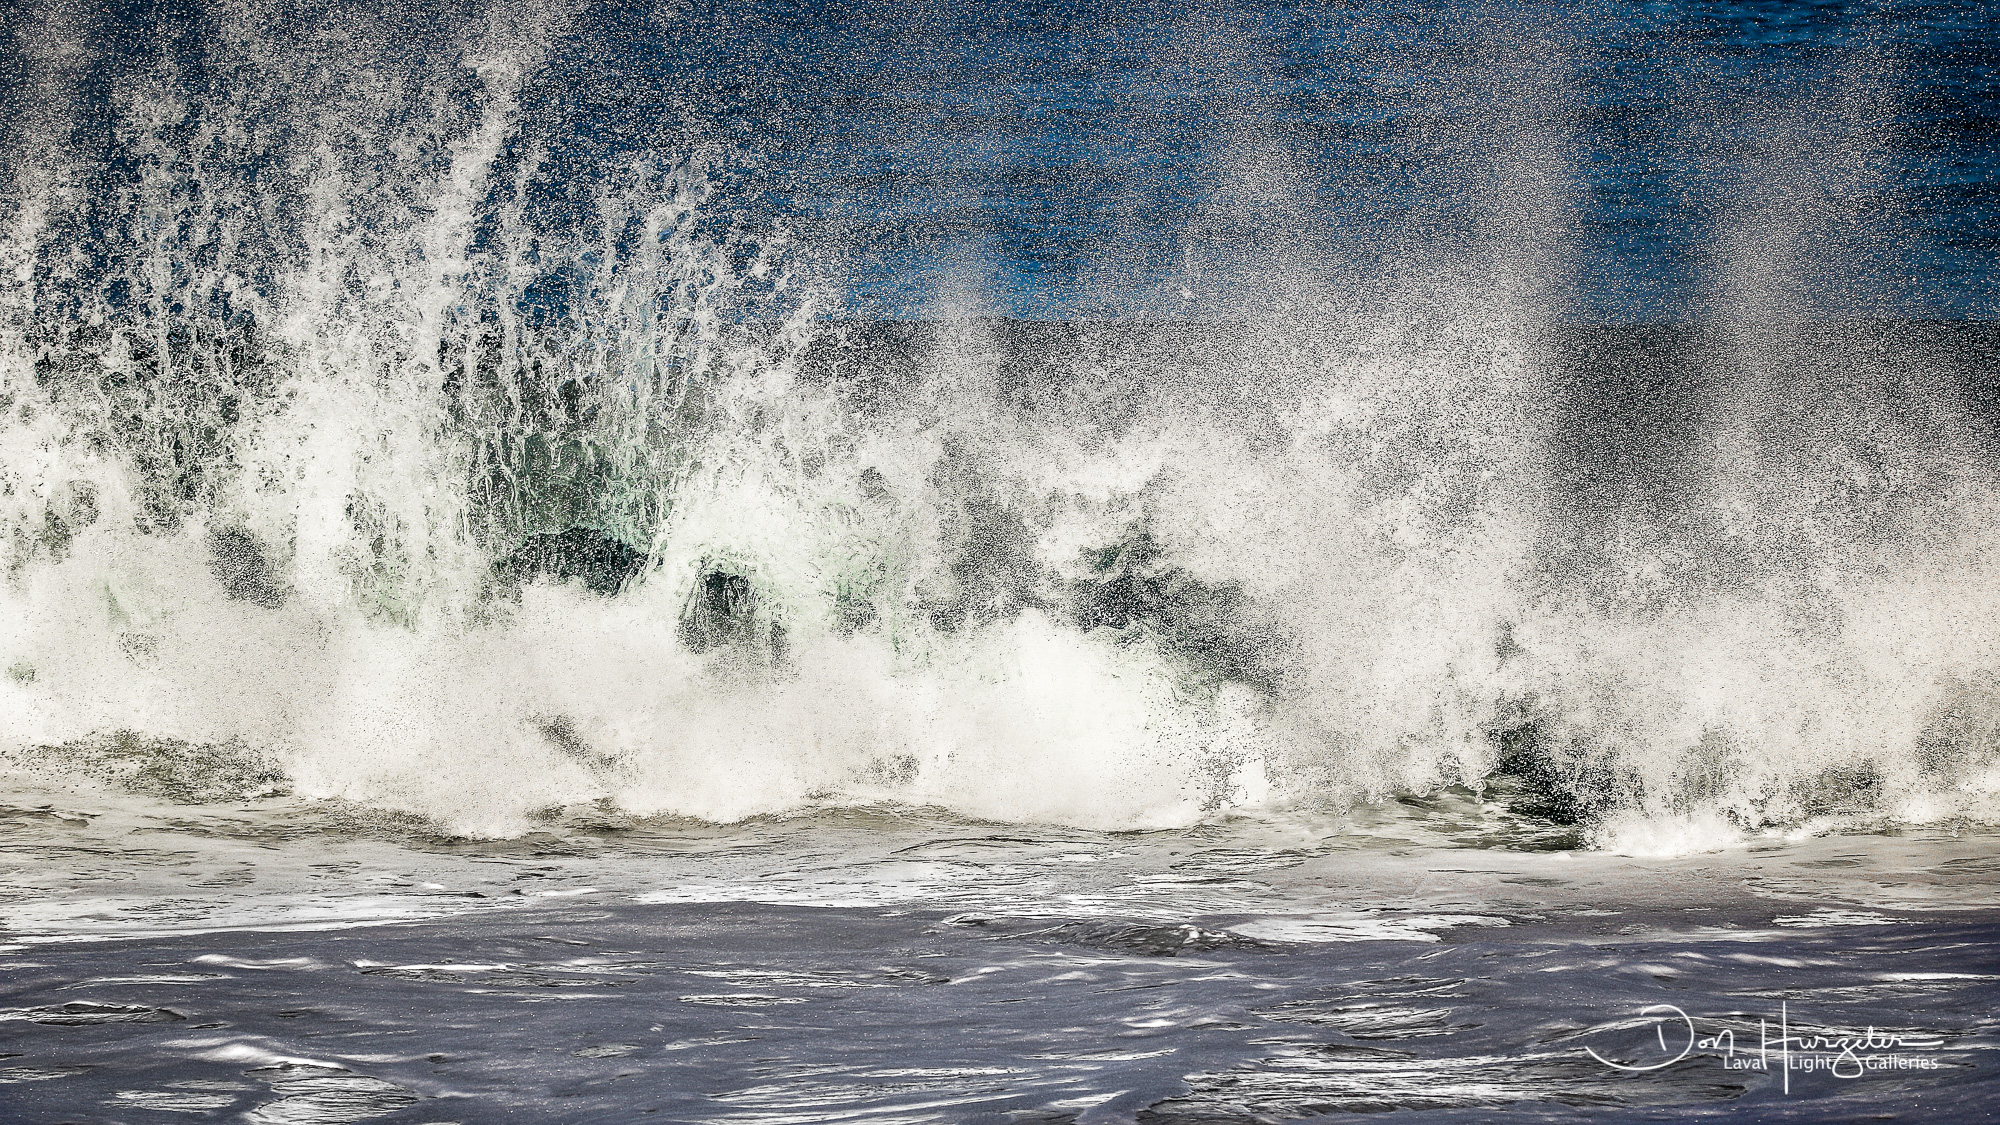
The last one is a crystal clear shot of the back of the tunnel of a wave. You can see the lip part of the wave curving over the top, sealing in the air and forming the tunnel. All the little concentric circles are from drops of water from the breaking lip of the wave landing on the tunnel. At the far left side you can see it starting to collapse and turn into white water. If the sun is in the right position, it makes these tubes either silver in color or reflective or both. It is an amazing thing to see…and only lasts for a few seconds.
So…lots going on when we are photographing waves. All the action takes place in one of the most violent parts of the ocean…the impact zone. Takes some getting use to so as to avoid getting injured. I’ve been doing it since the 1970’s and I still get smashed on a regular basis. So, if you are going to gear up and give it a try…make sure your medical insurance is in place and has a low deductible. And when it gets big…come join me on the beach with a telephoto lens so we can enjoy watching CJ doing what he does best.